Workspace Roles
Workspace roles are used to manage user actions to a workspace. On service start, builtin roles are created with their associated actions which can be assigned to a user on a particular workspace. These builtin roles can be updated, deleted, and new ones added.
The following builtin roles are created on service initialization:
| Built-in Role | Actions |
|---|---|
| Admin | add_role_users, create_computation, create_cvms, delete, disable, enable, manage_role, read, remove_cvms, remove_role_users, update, view_role_users |
Role Management
Overview
Role management is a critical component of access control in workspaces. Each role defines a set of actions a user is permitted to perform, ensuring that users have only the necessary actions for their responsibilities.
A key constraint in the role system is that a user can only belong to a single role at a time. If multiple actions from different roles are required, an existing builtin role can be updated to include these actions, or a [new custom role](#Creating a Role) can be created with those combined actions.
Builtin roles provide the most basic roles with single actions that can be updated or added depending on the user's requirements.
Role Purpose in Workspace
Roles are essential in governing who can interact with a workspace and how. In the workspace, assigned roles determine access to various resources, such as CVMs creations. Each role is mapped to a set of predefined actions that enforce security and operational boundaries within a workspace.
Accessing Role Management
To manage roles, follow these steps:
- Navigate to the Workspace page.
- Click the Roles button to manage user roles.
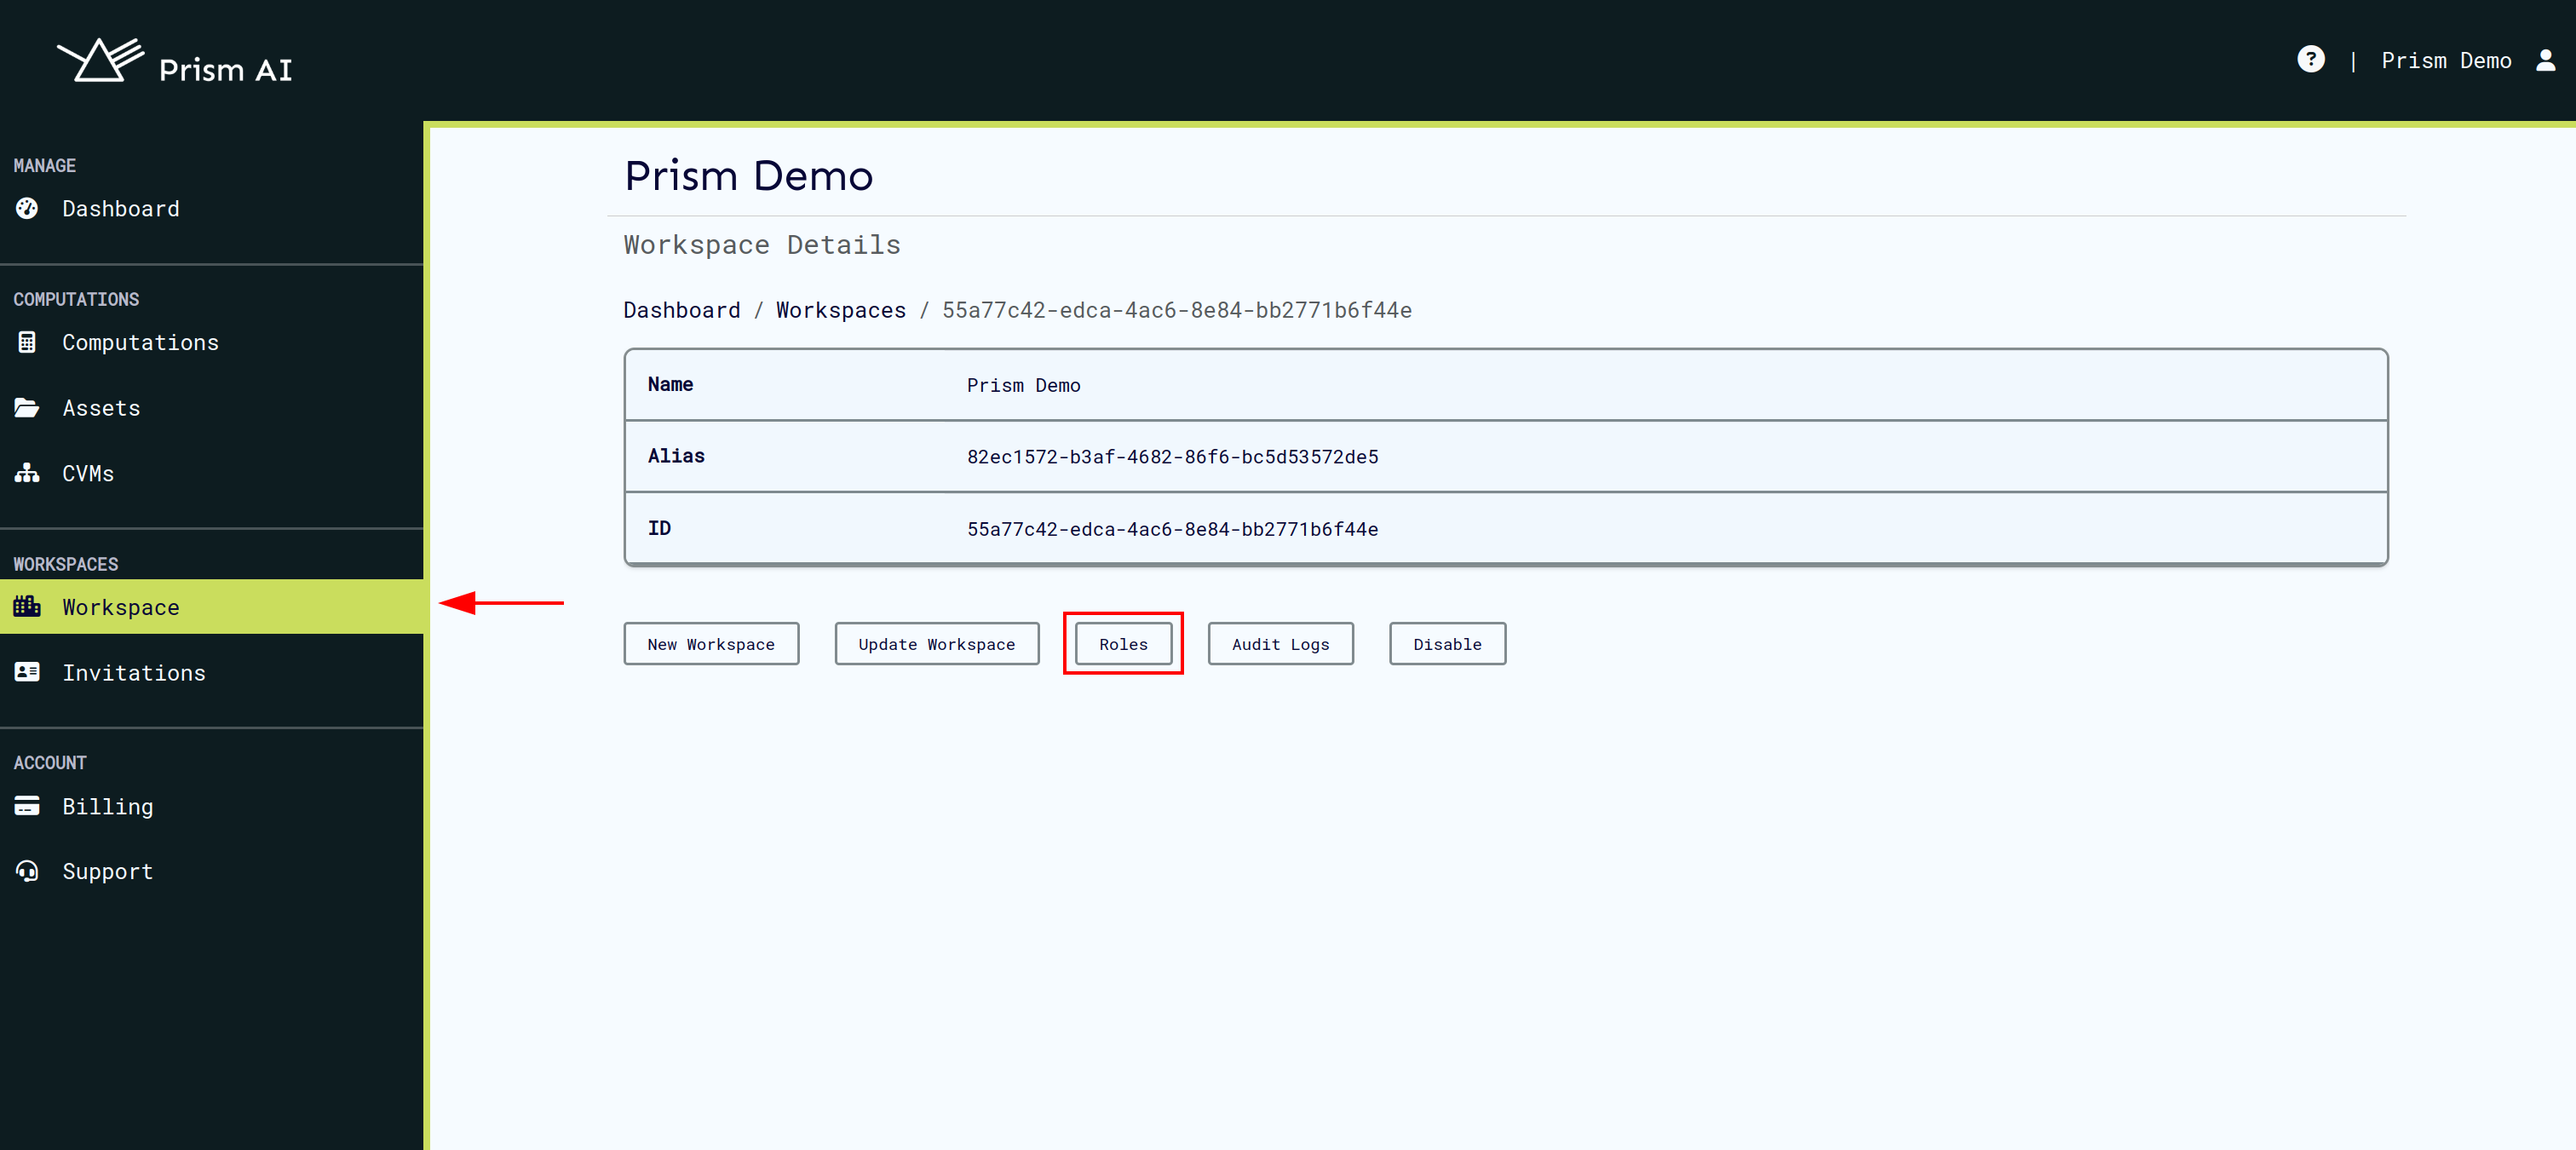
Clicking the Roles button will display all predefined built-in roles and their associated actions.
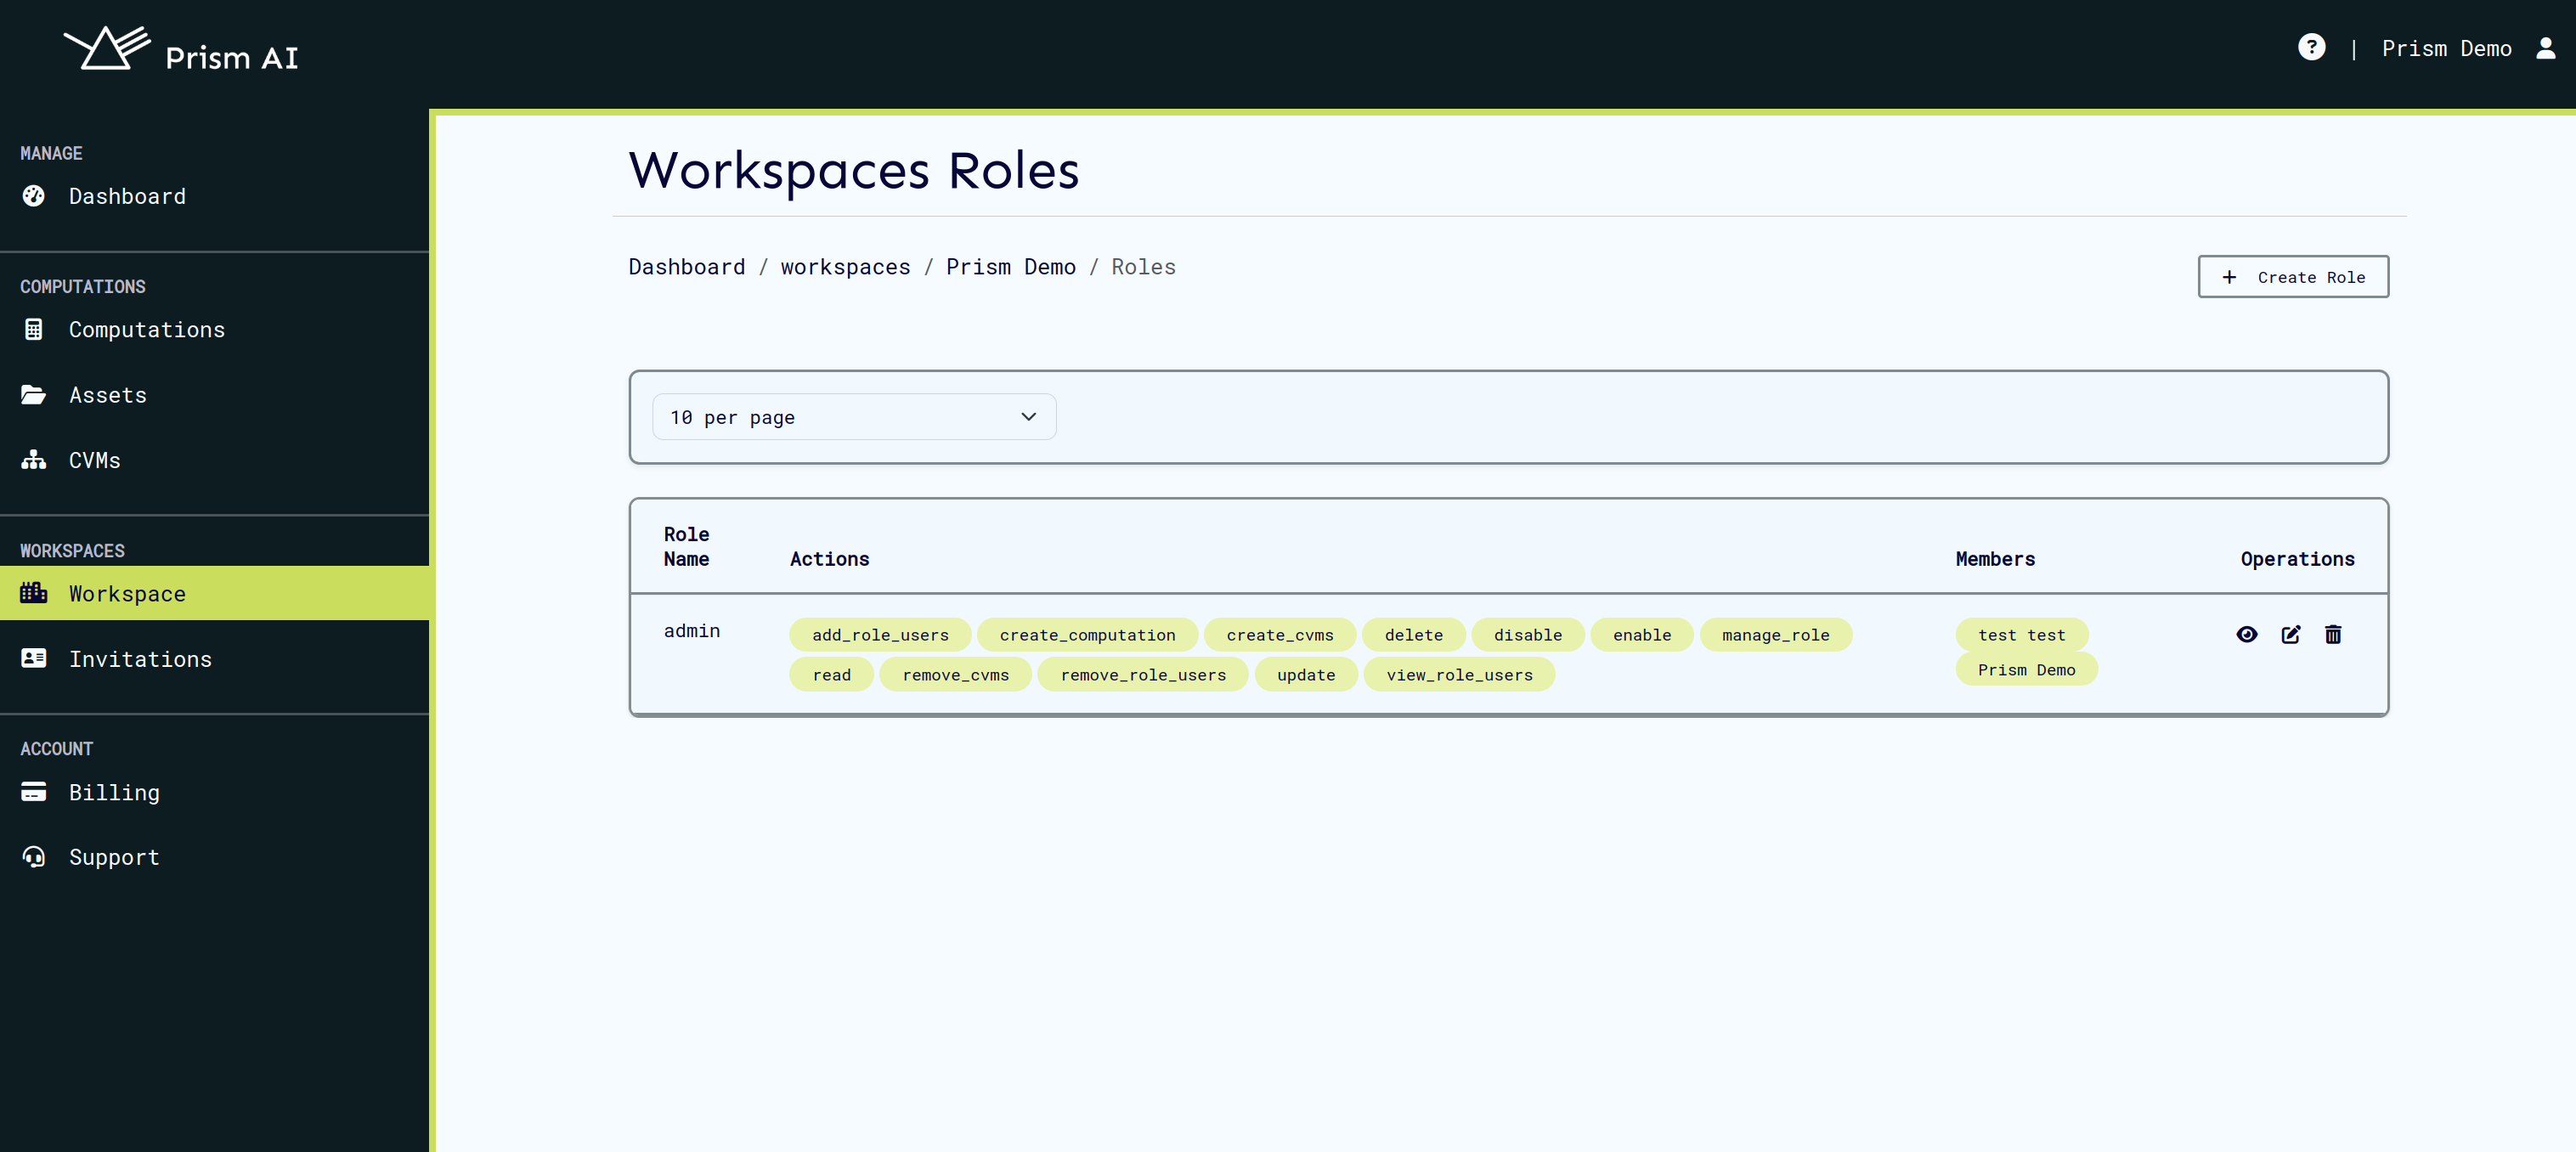
Built-in Roles and Their Actions
The system provides predefined built-in roles, each granting specific access levels. The available built-in roles and their associated actions are:
| Built-in Role | Actions | Description |
|---|---|---|
| Admin | add_role_users, create_computation, create_cvms, delete, disable, enable, manage_role, read, remove_cvms, remove_role_users, update, view_role_users | Full control over the workspace, including modifying roles and actions. |
Explanation of Actions
Each action in a role defines what the user can do:
- read – Allows the user to view workspace details but not modify them.
- delete – Grants the ability to modify workspace properties.
- create_cvms – Enables creation of a CVM.
- remove_cvms – Enables removal of a CVM.
- add_role_users – Allows the user to add user roles.
- update – Grants the ability to modify workspace properties.
- view_role_users – Allows the user to see user roles but not modify them.
- remove_role_users – Allows the user to remove user roles but not modify them.
- manage_role – Allows the user to manage roles such as addition of actions.
- create_computation – Enables creation of a computation.
- disable – Allows the user to disable resources.
- enable – Allows the user to enable resources.
Managing Roles
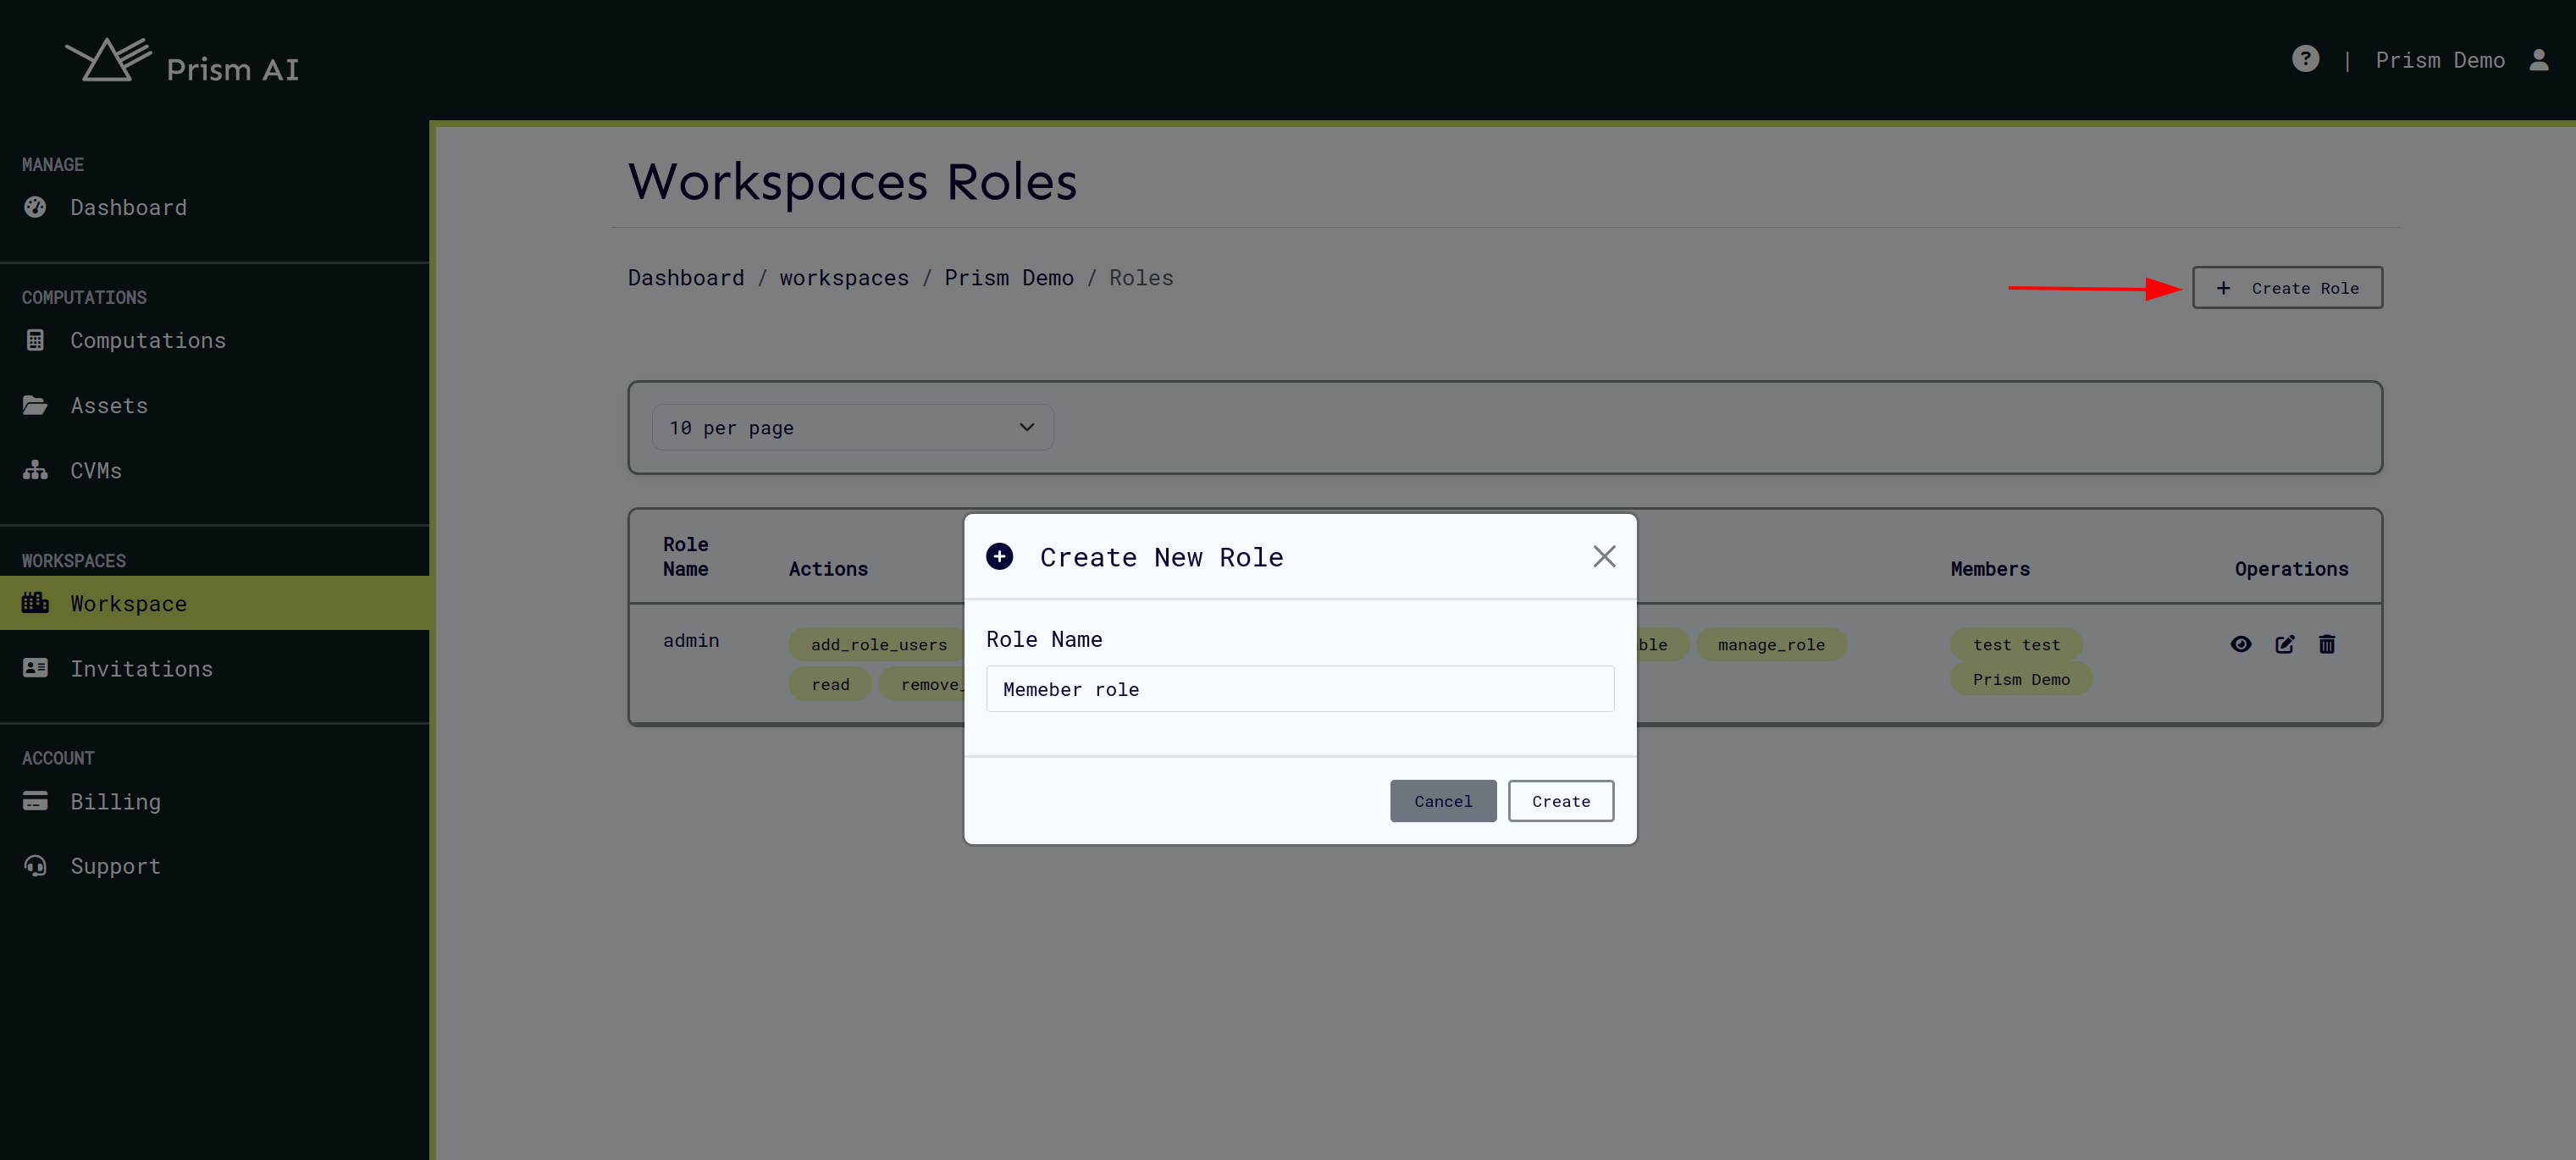
Creating a Role
To create a role, the following steps can be followed.
- Click the Create Role button.
- Define the role name and select the required actions.
- Save the role to make it available for assignment.
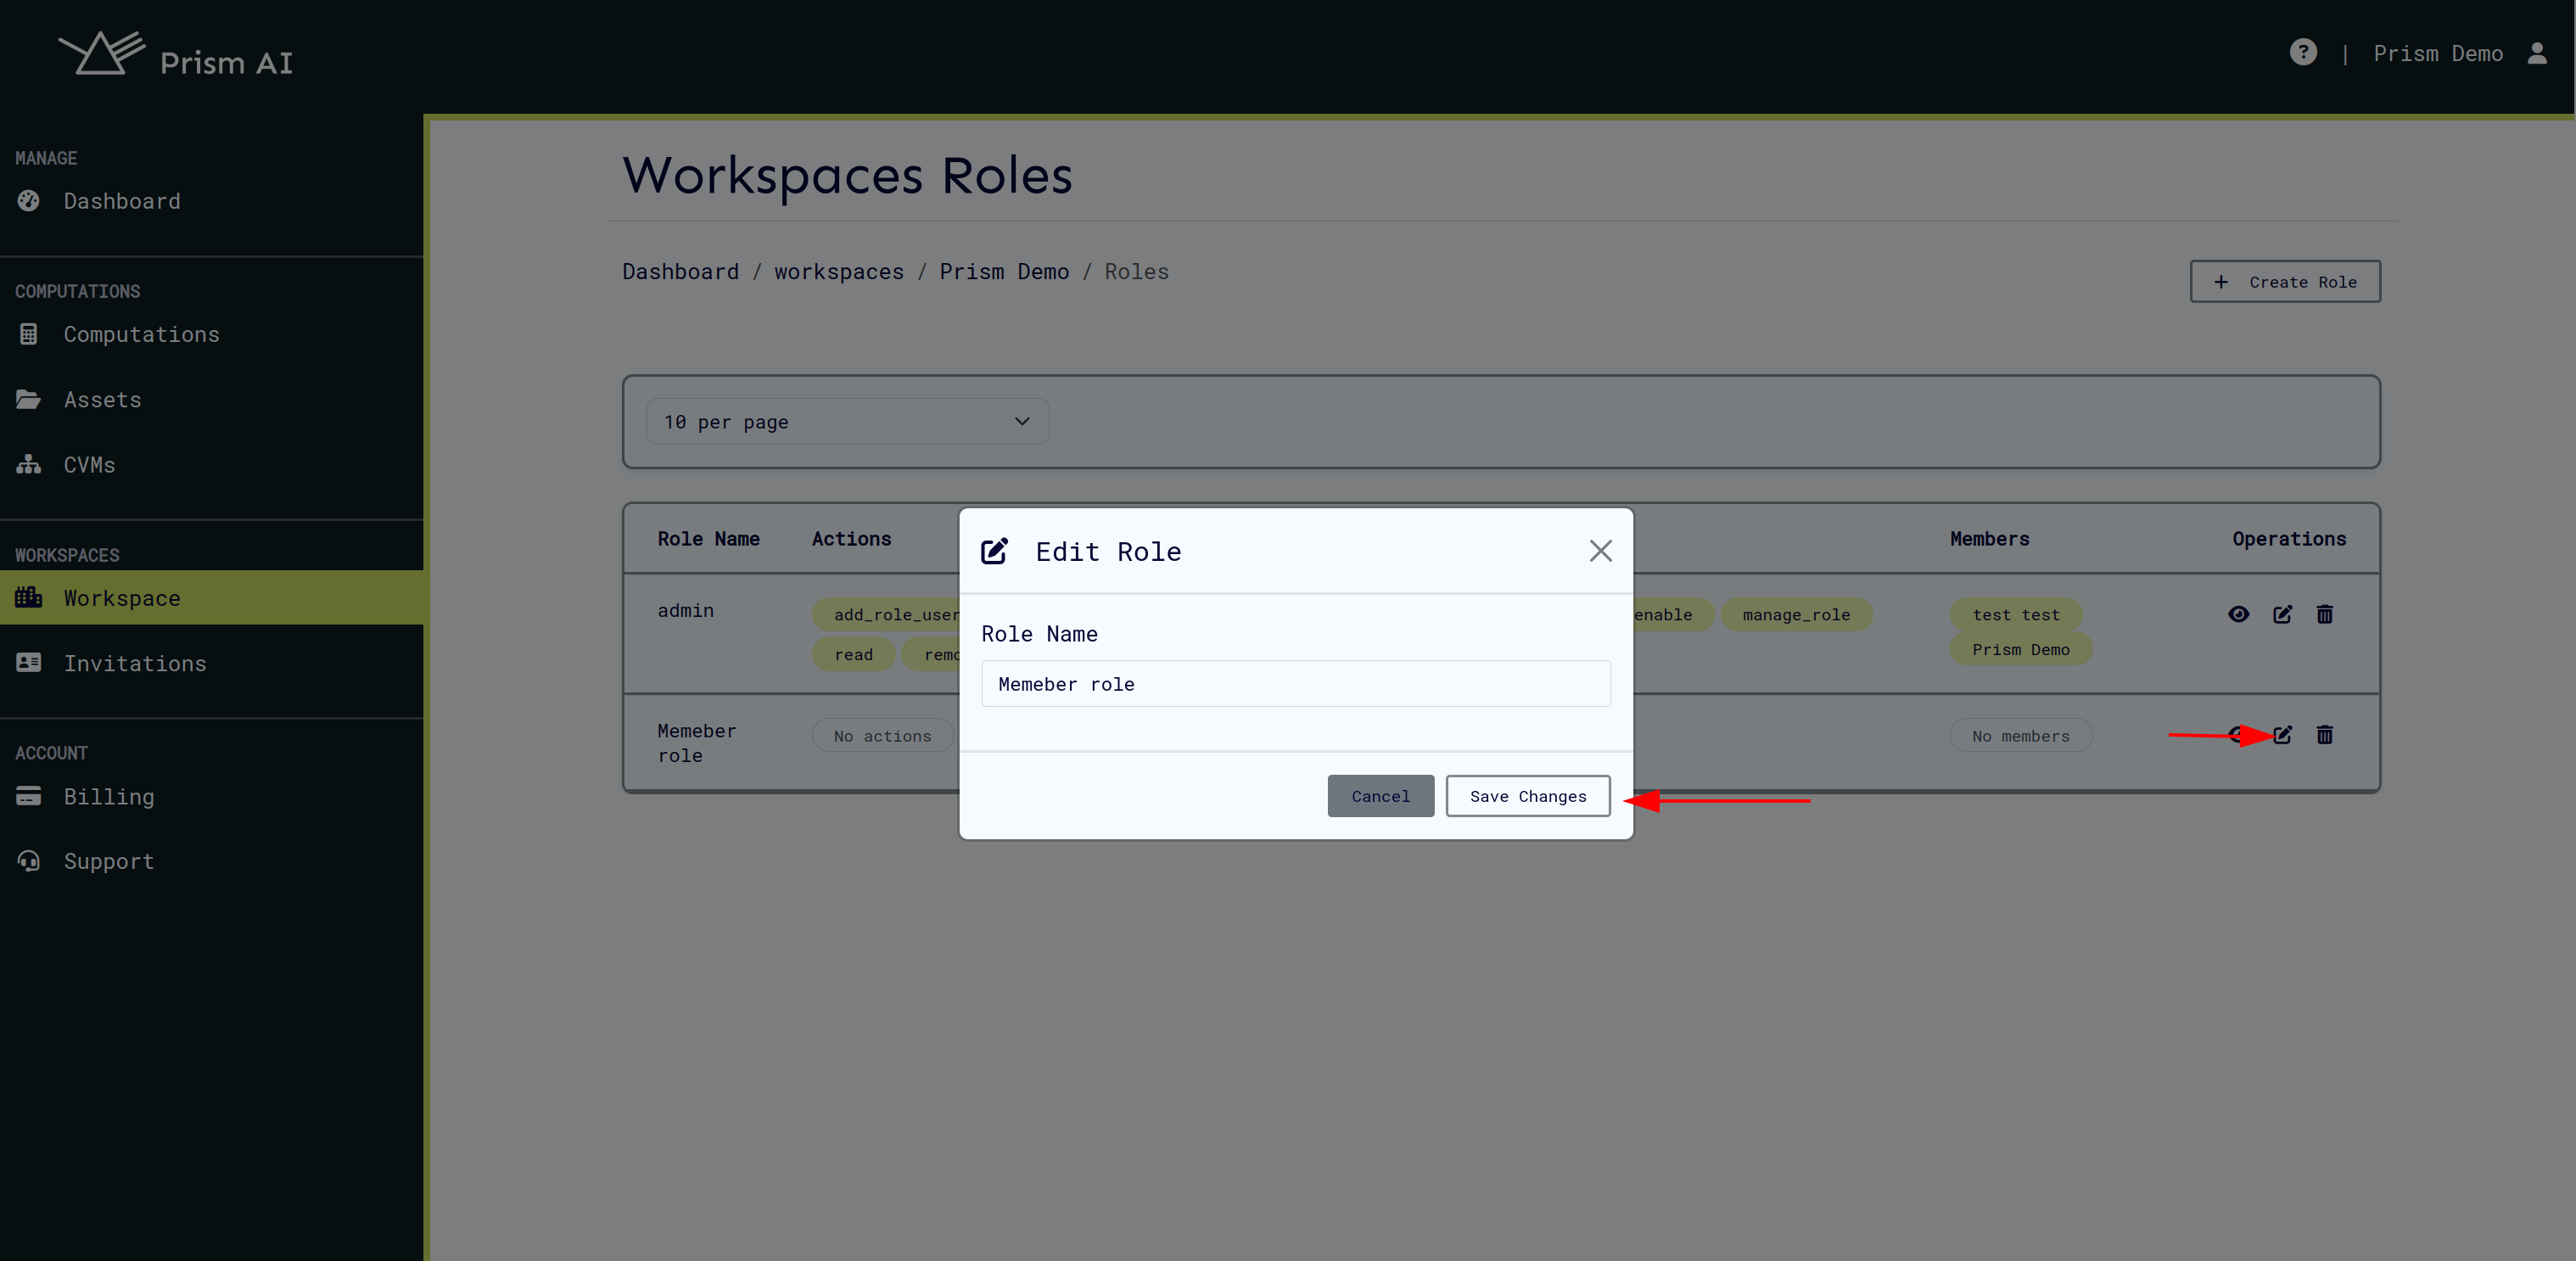
Updating a Role
Existing roles can be modified if actions need to be adjusted.
- Click the Update Role button next to the role.
- Modify the role’s name or actions.
- Save the changes to update the role.
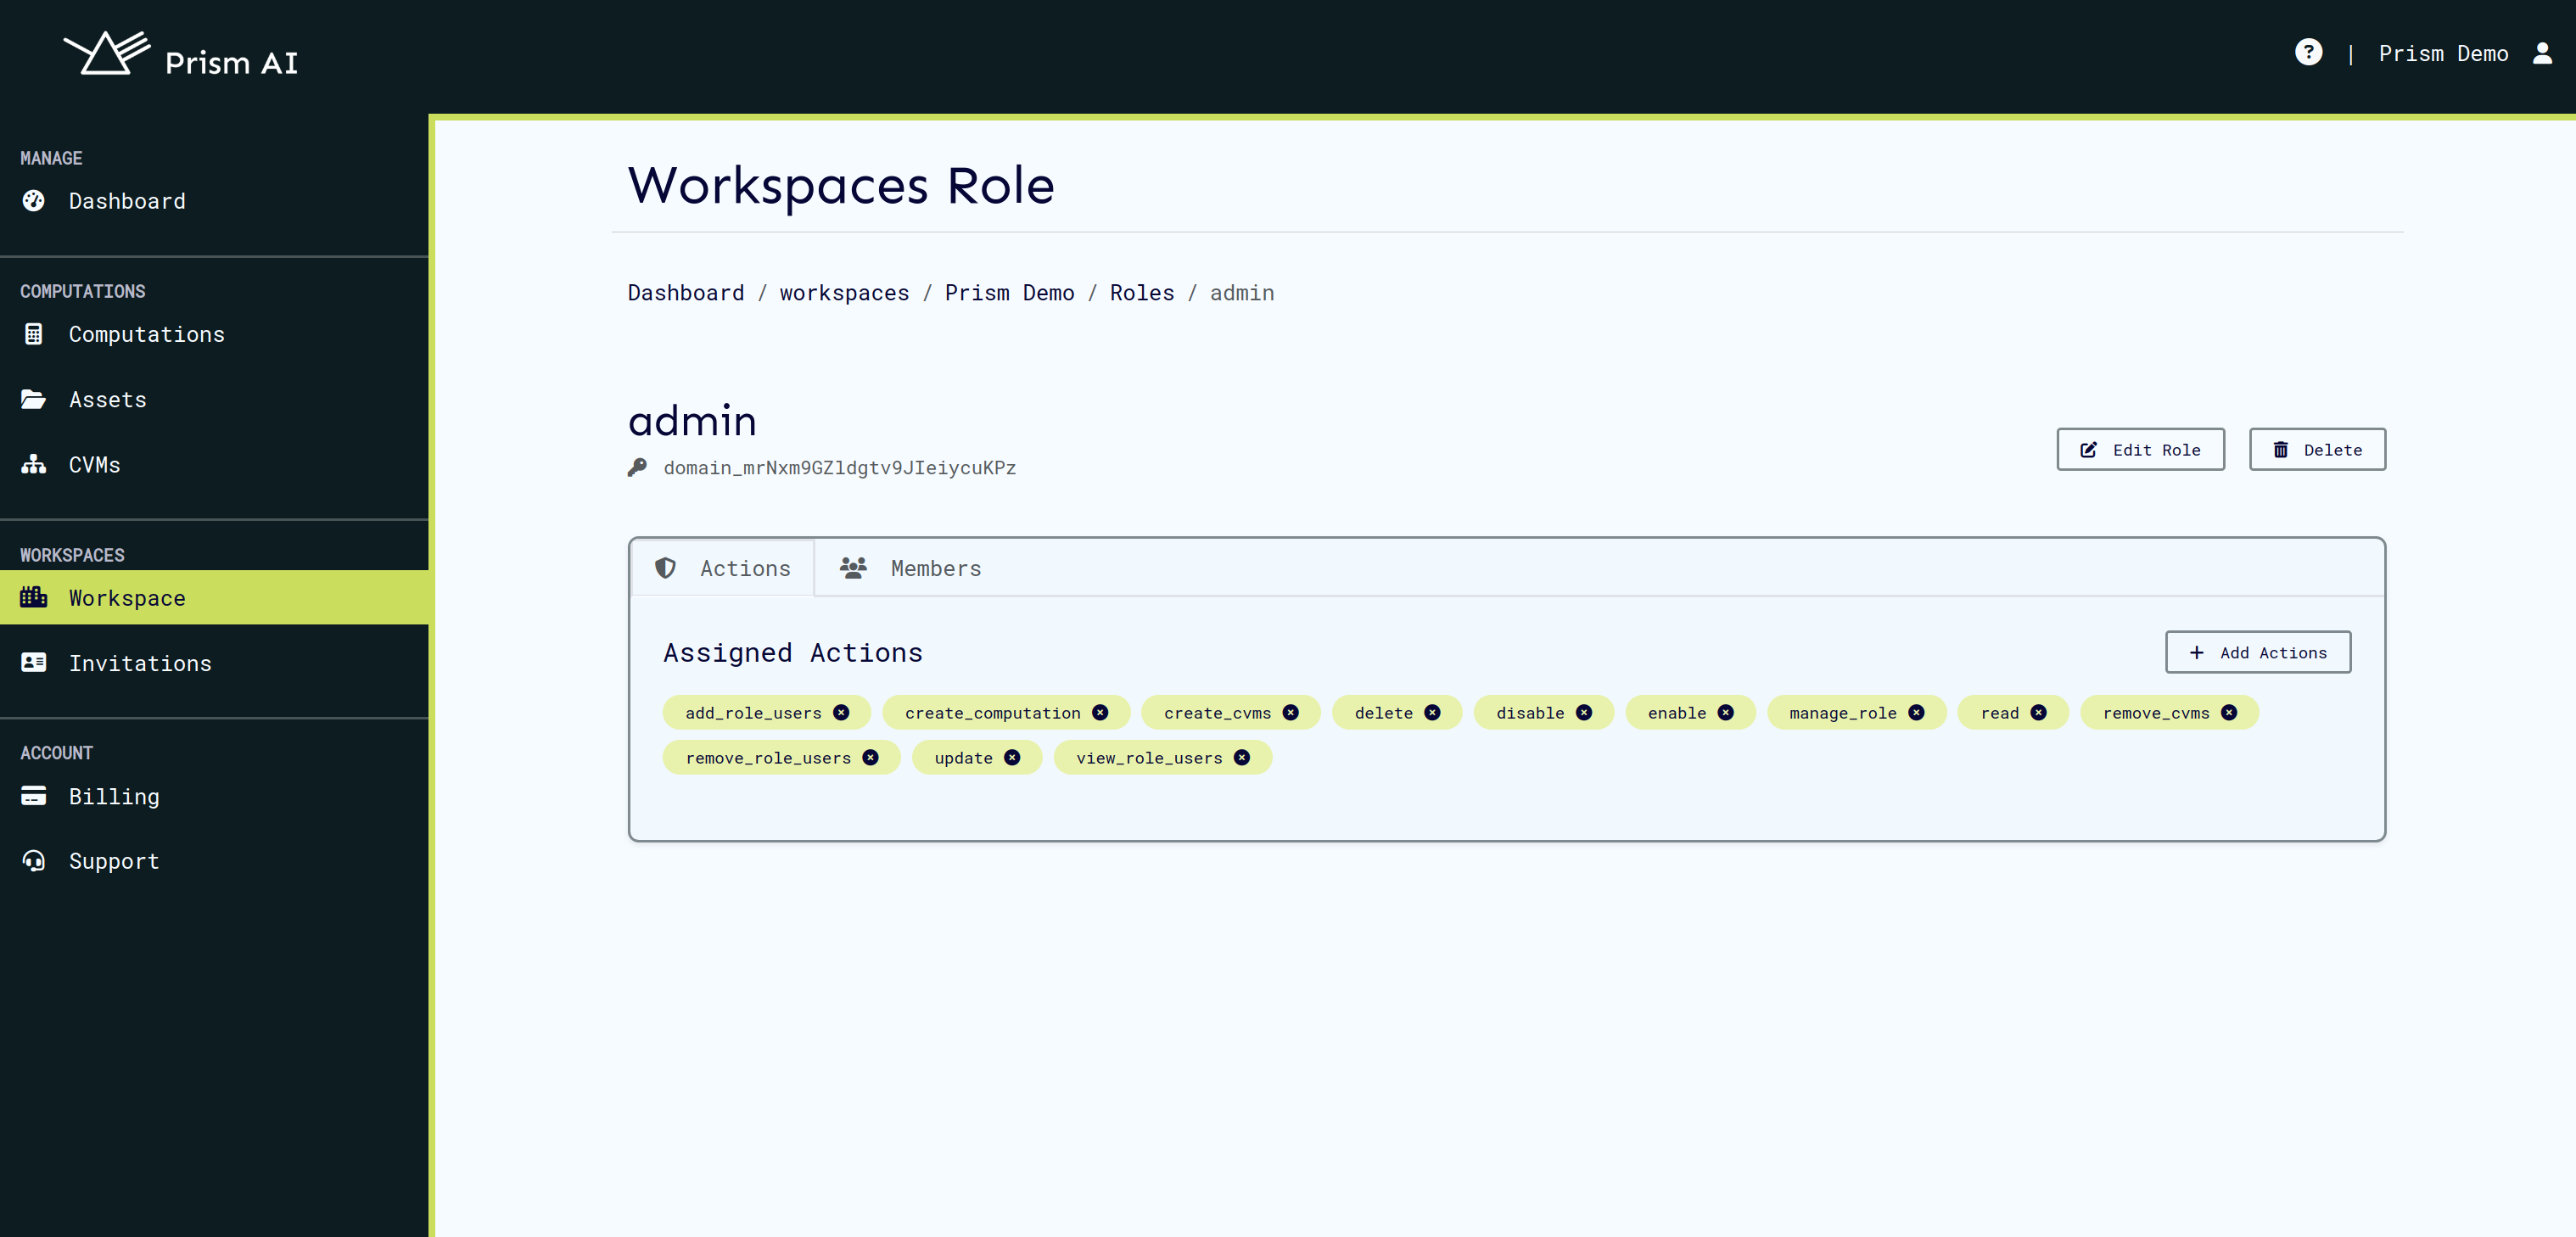
Viewing Role Details
To see details about a role, including its assigned actions and members, click the View Role button.
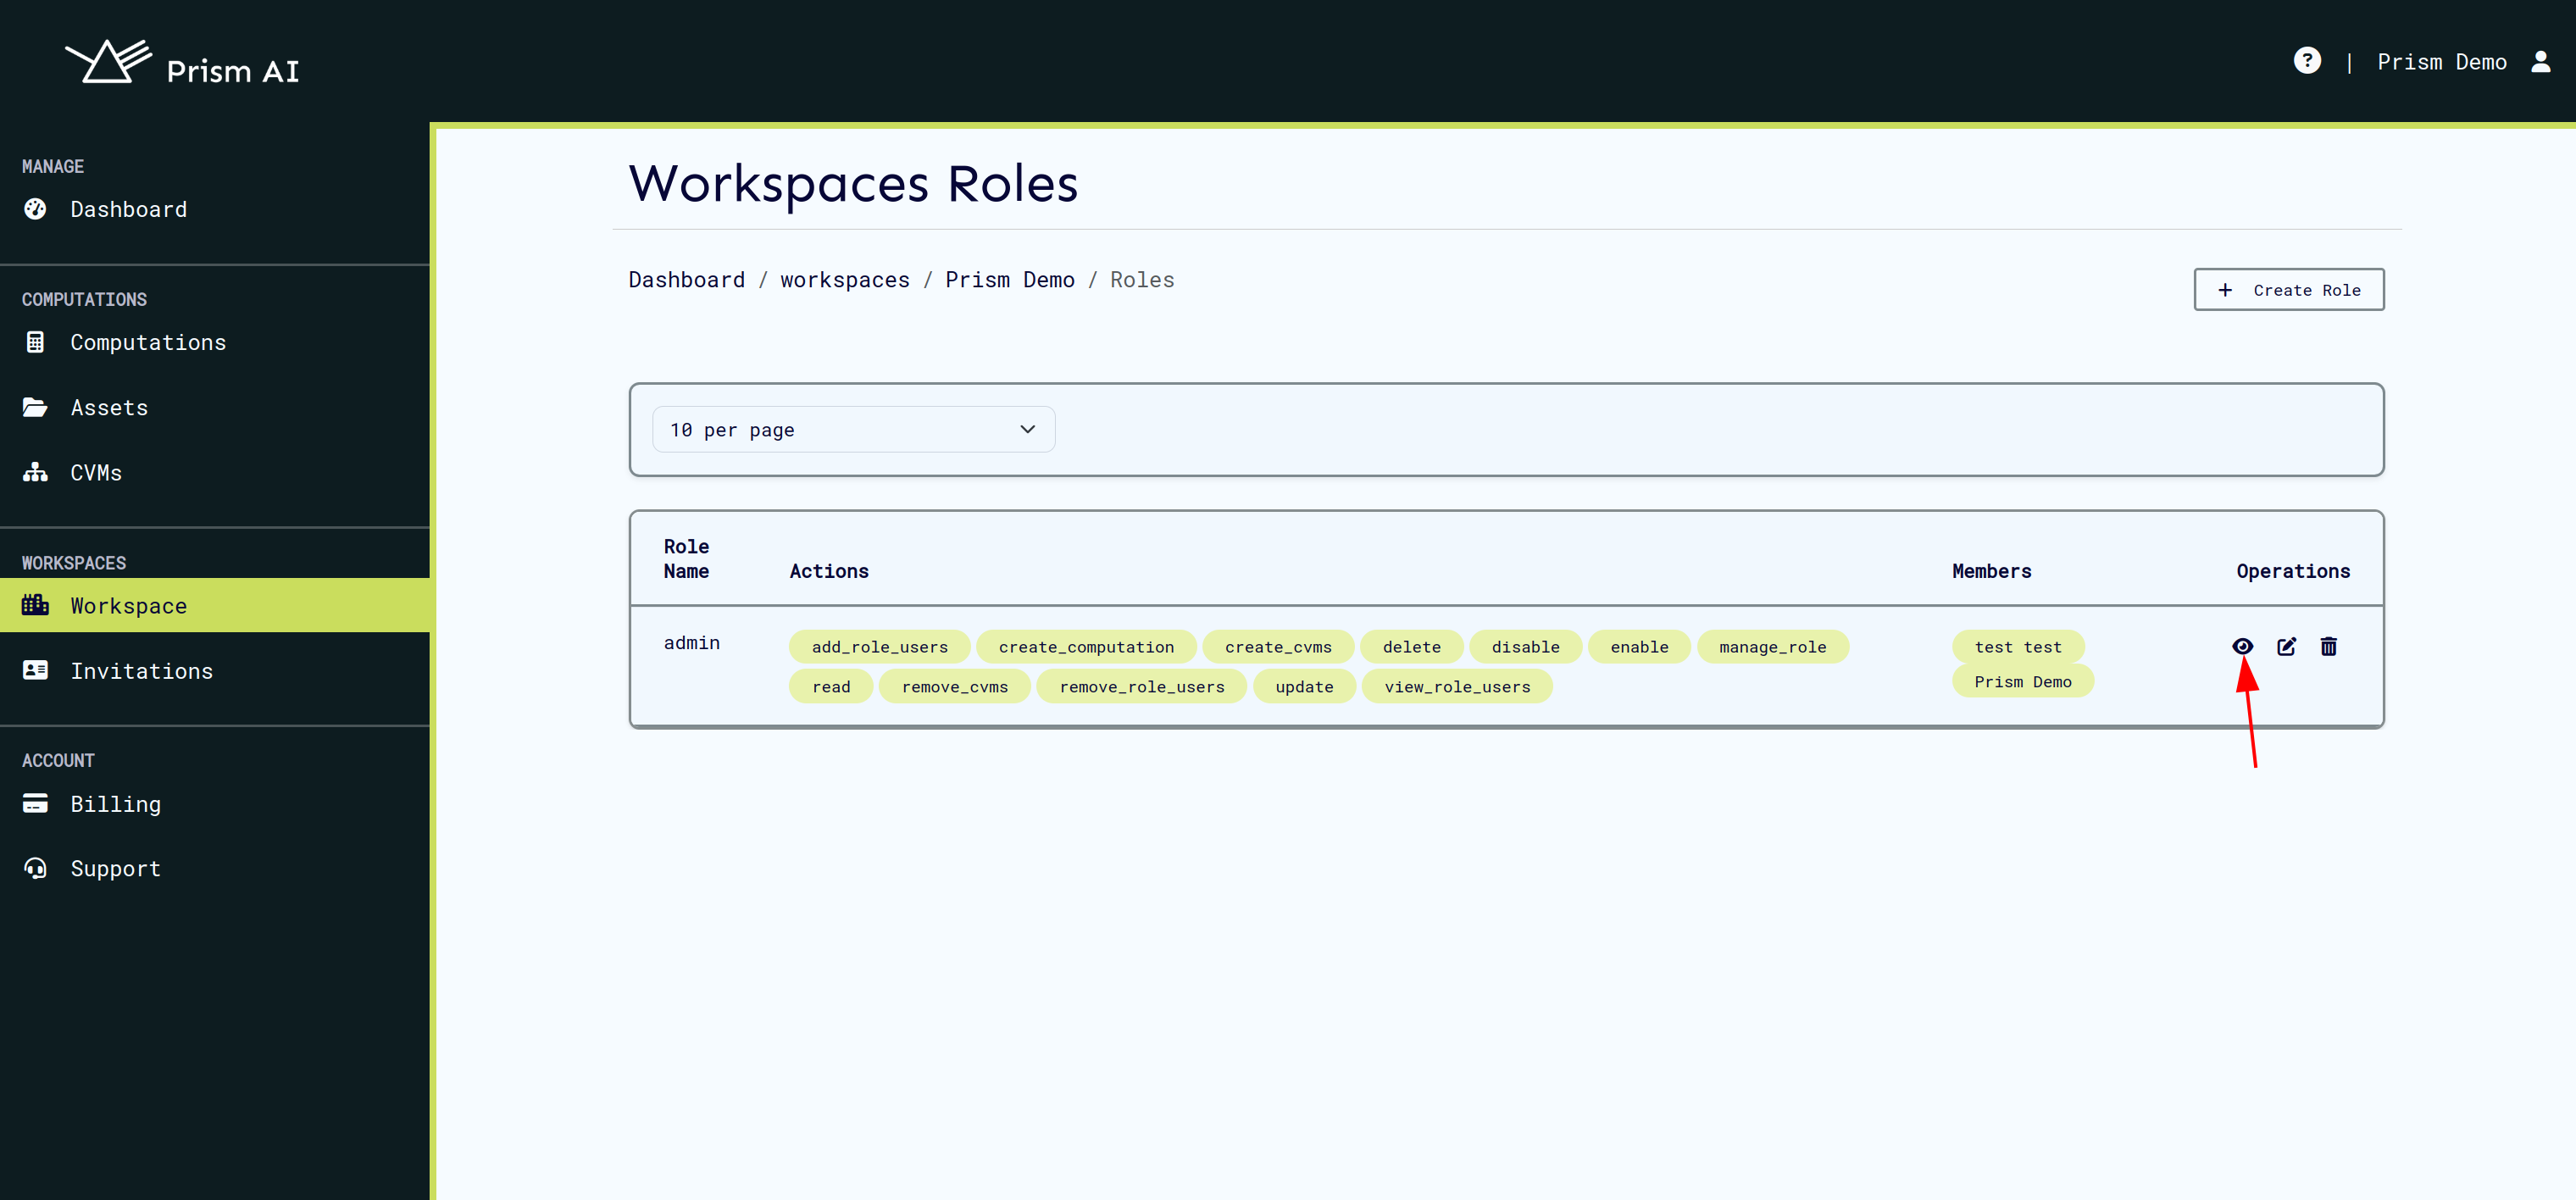
This will display:
- Role Actions – The actions assigned to the role.
- Role Members – A list of users assigned to this role.

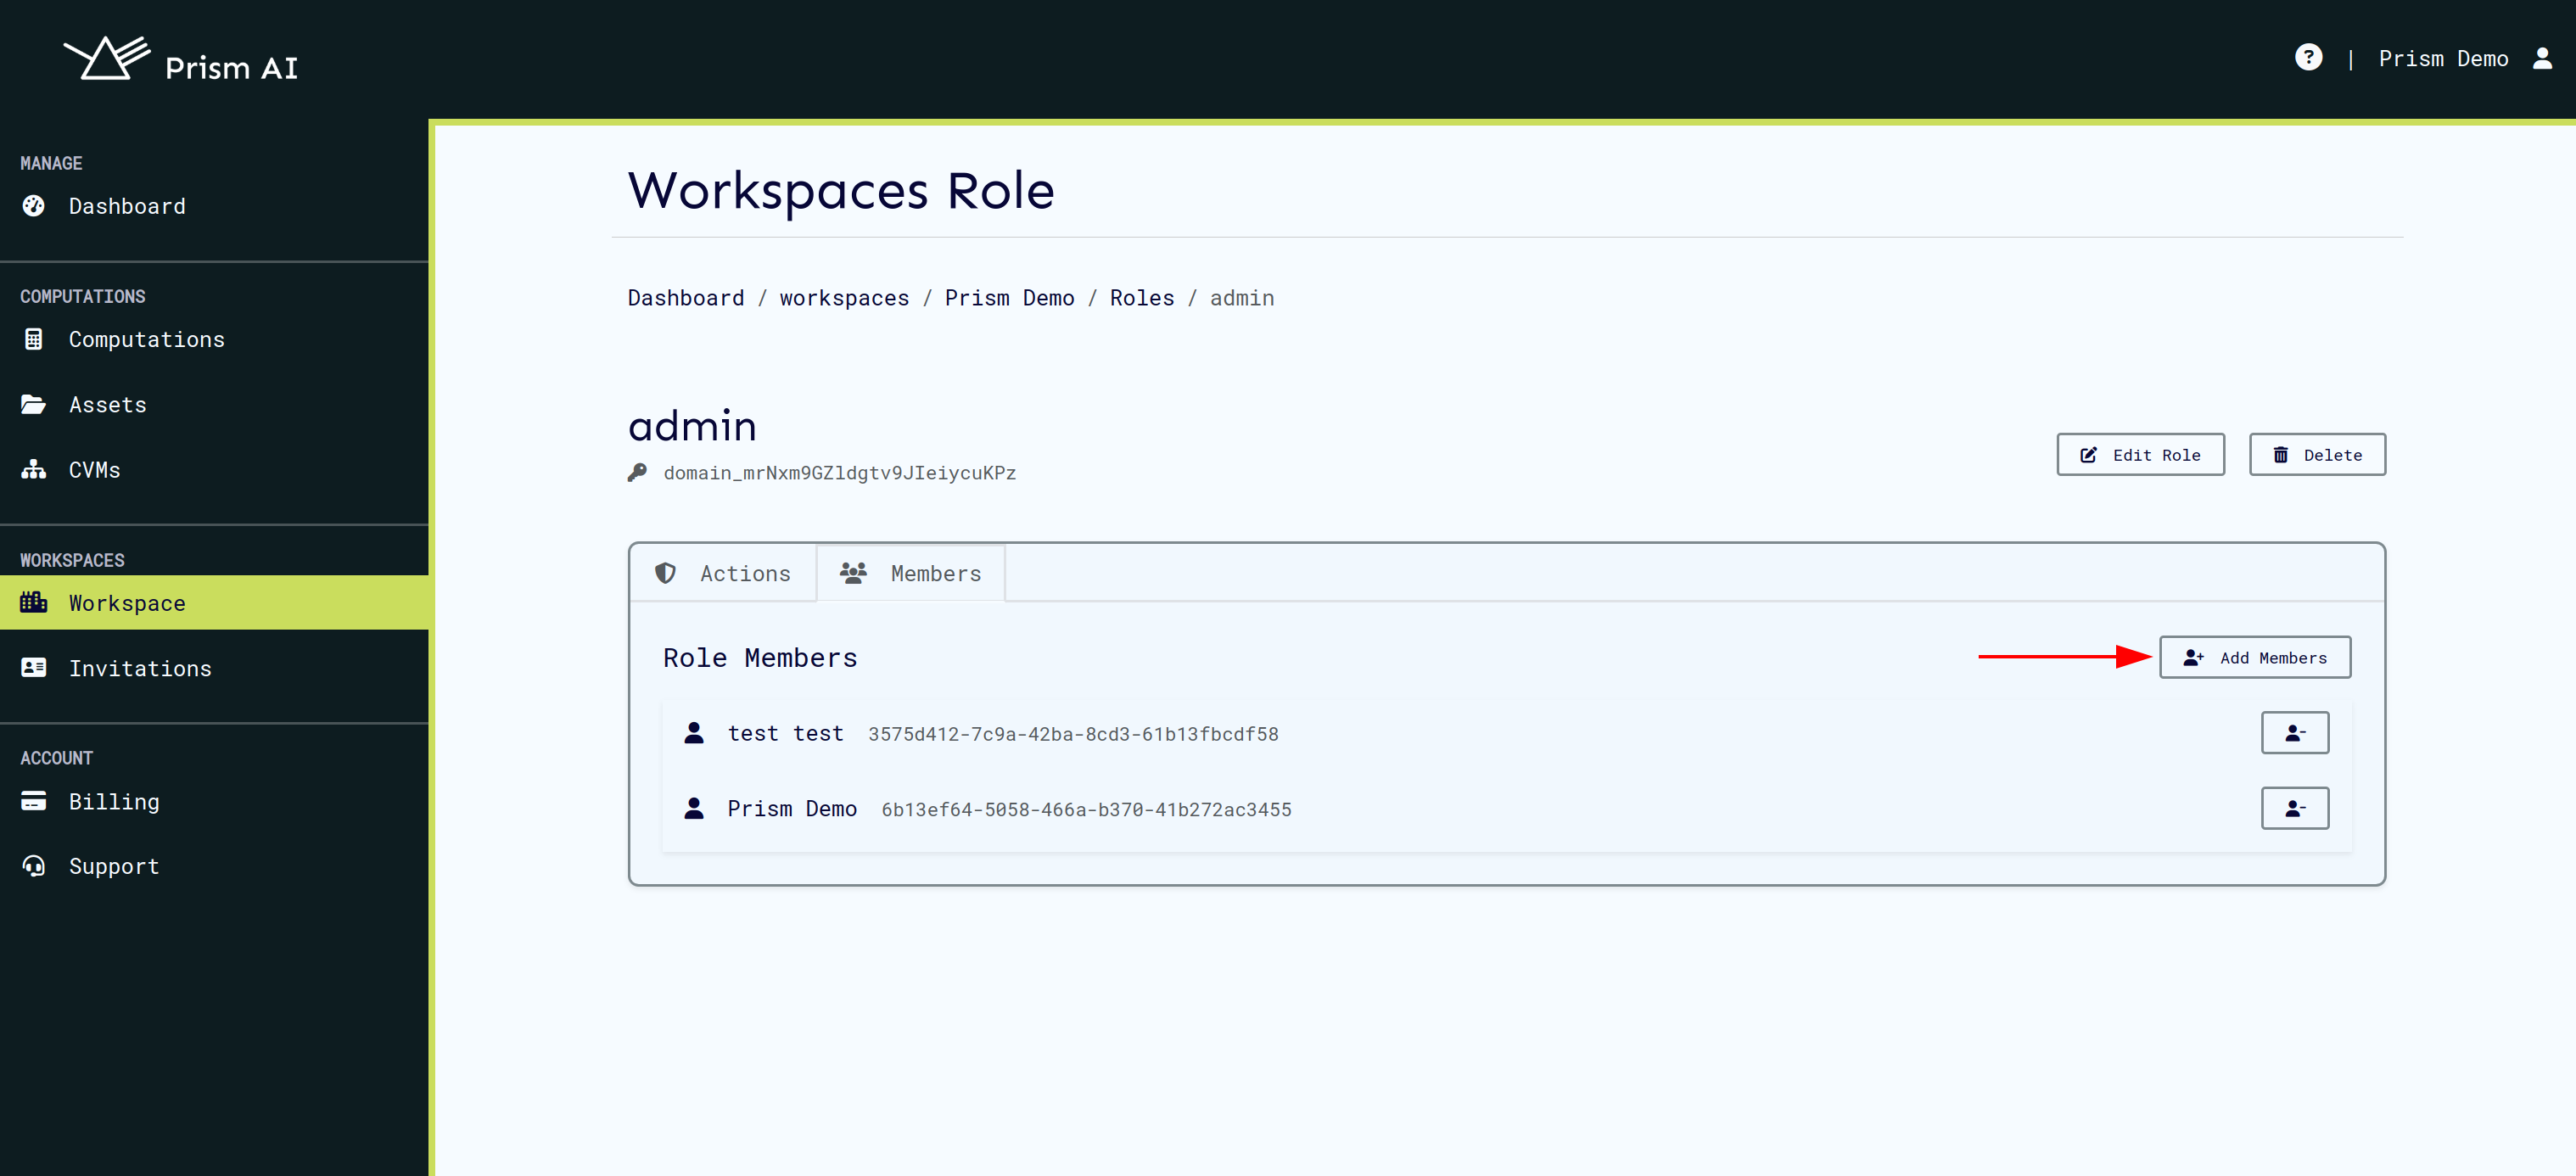
Managing Users in Roles
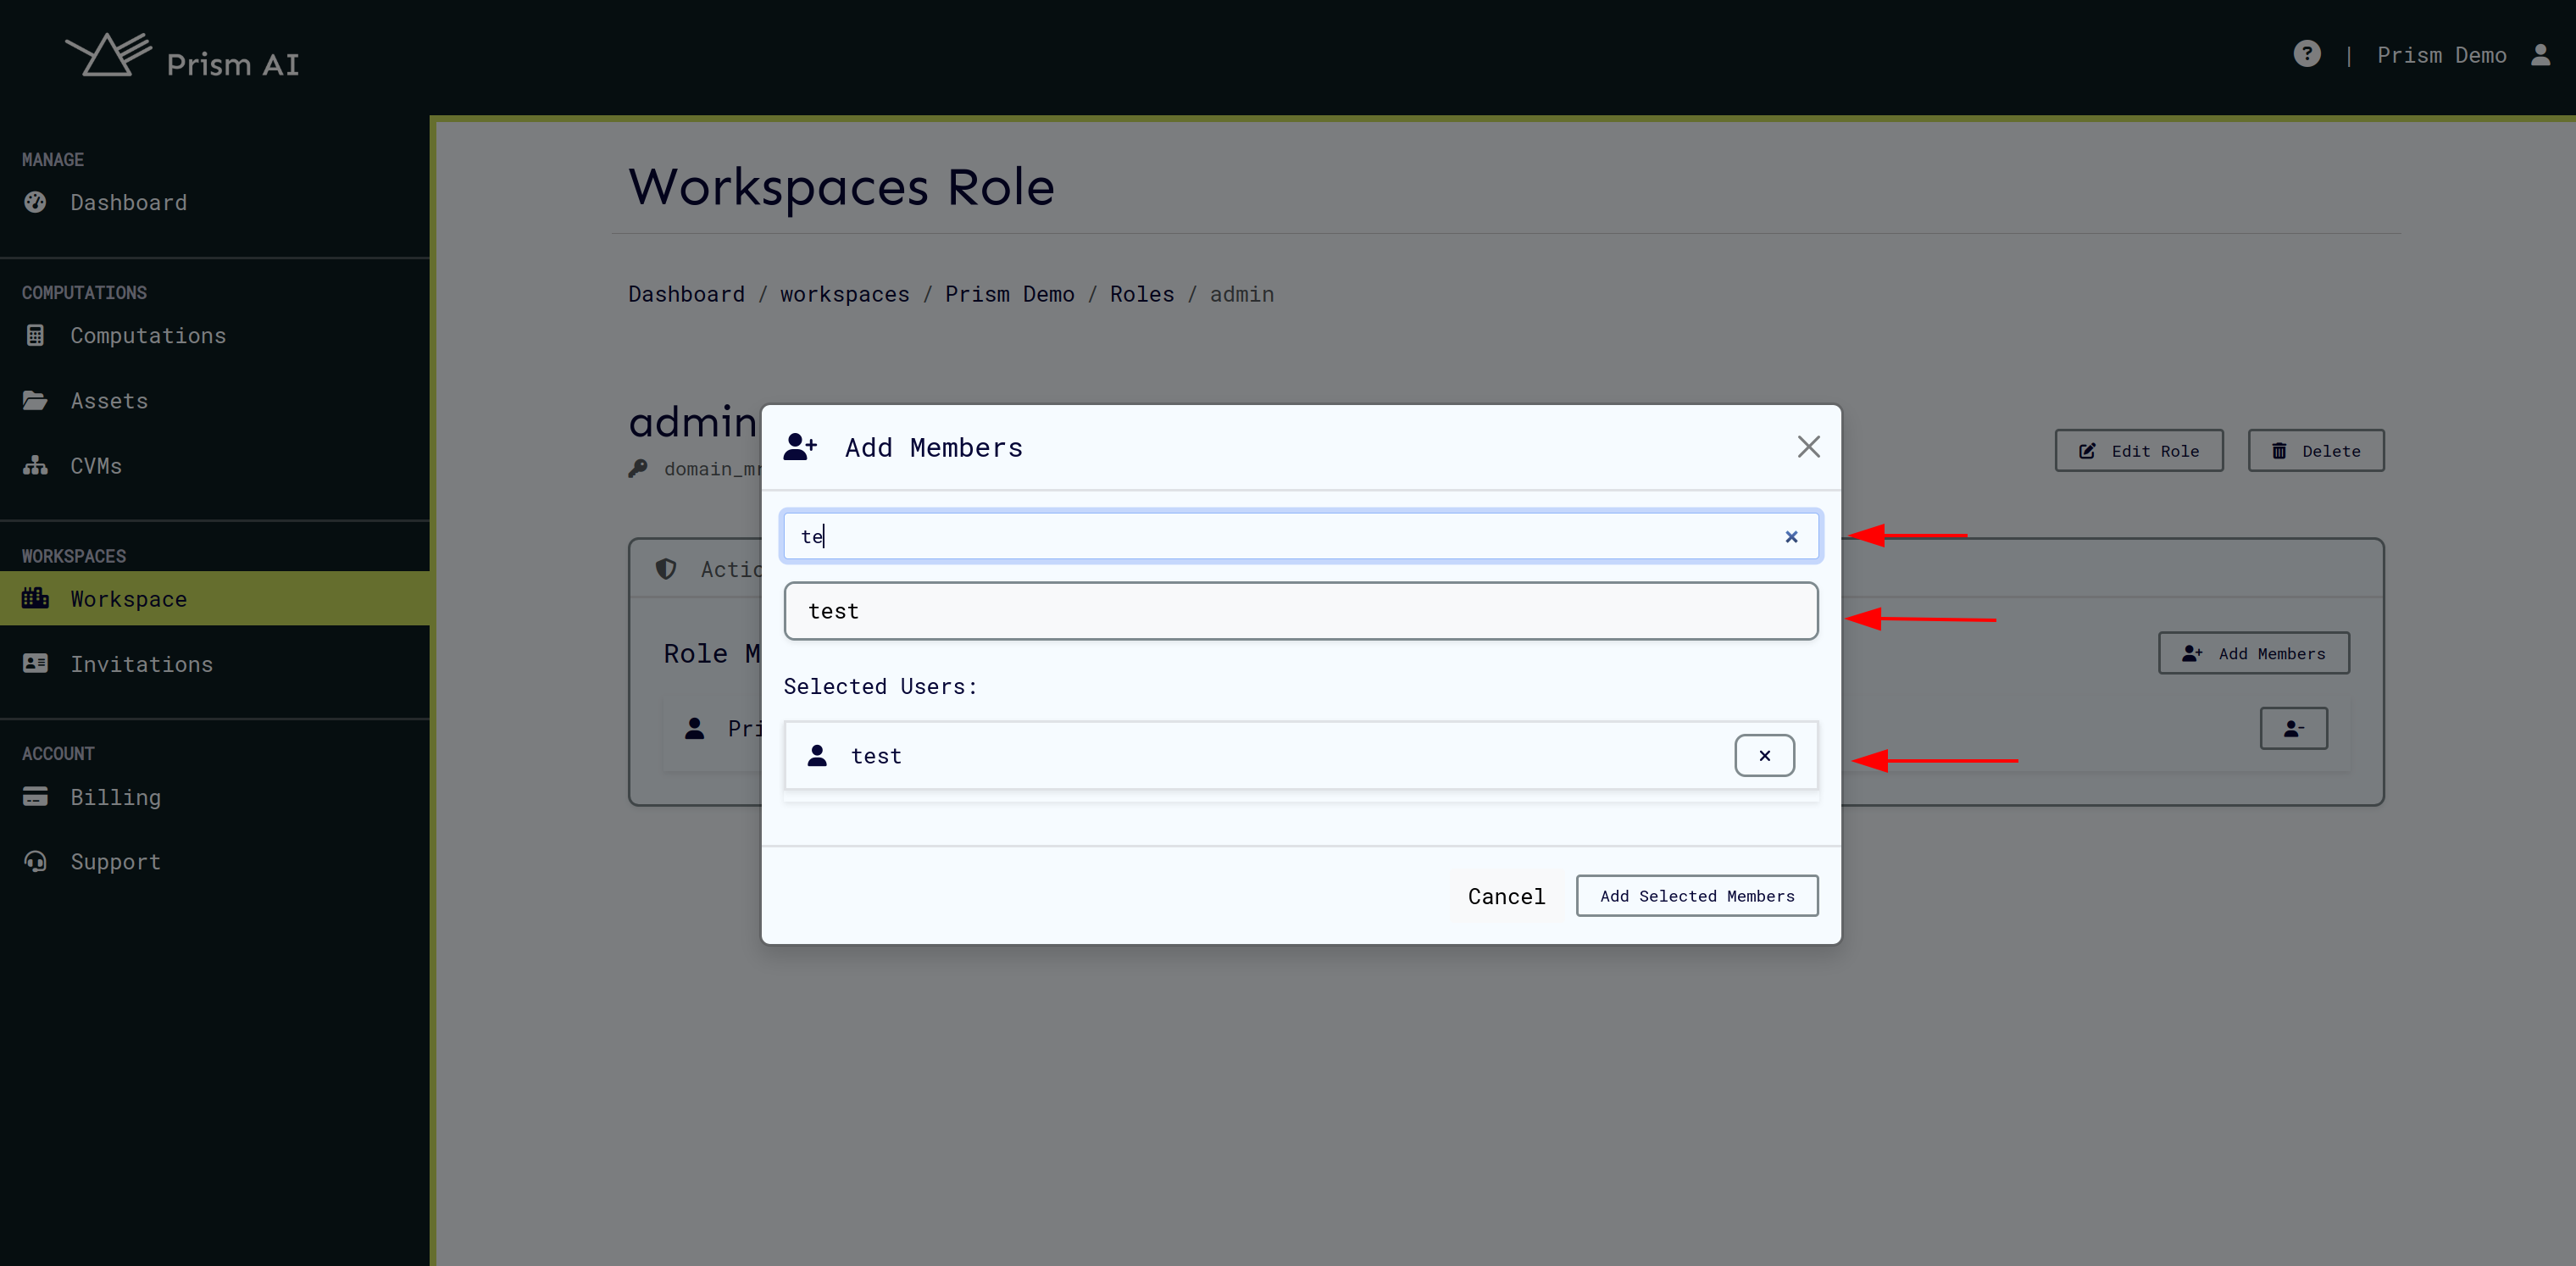
Adding a User to a Role
Since a user can only have one role at a time, ensure that the assigned role includes all necessary actions.
- Click the Add Members button.
- Select users to assign to the role.
- Confirm the selection.
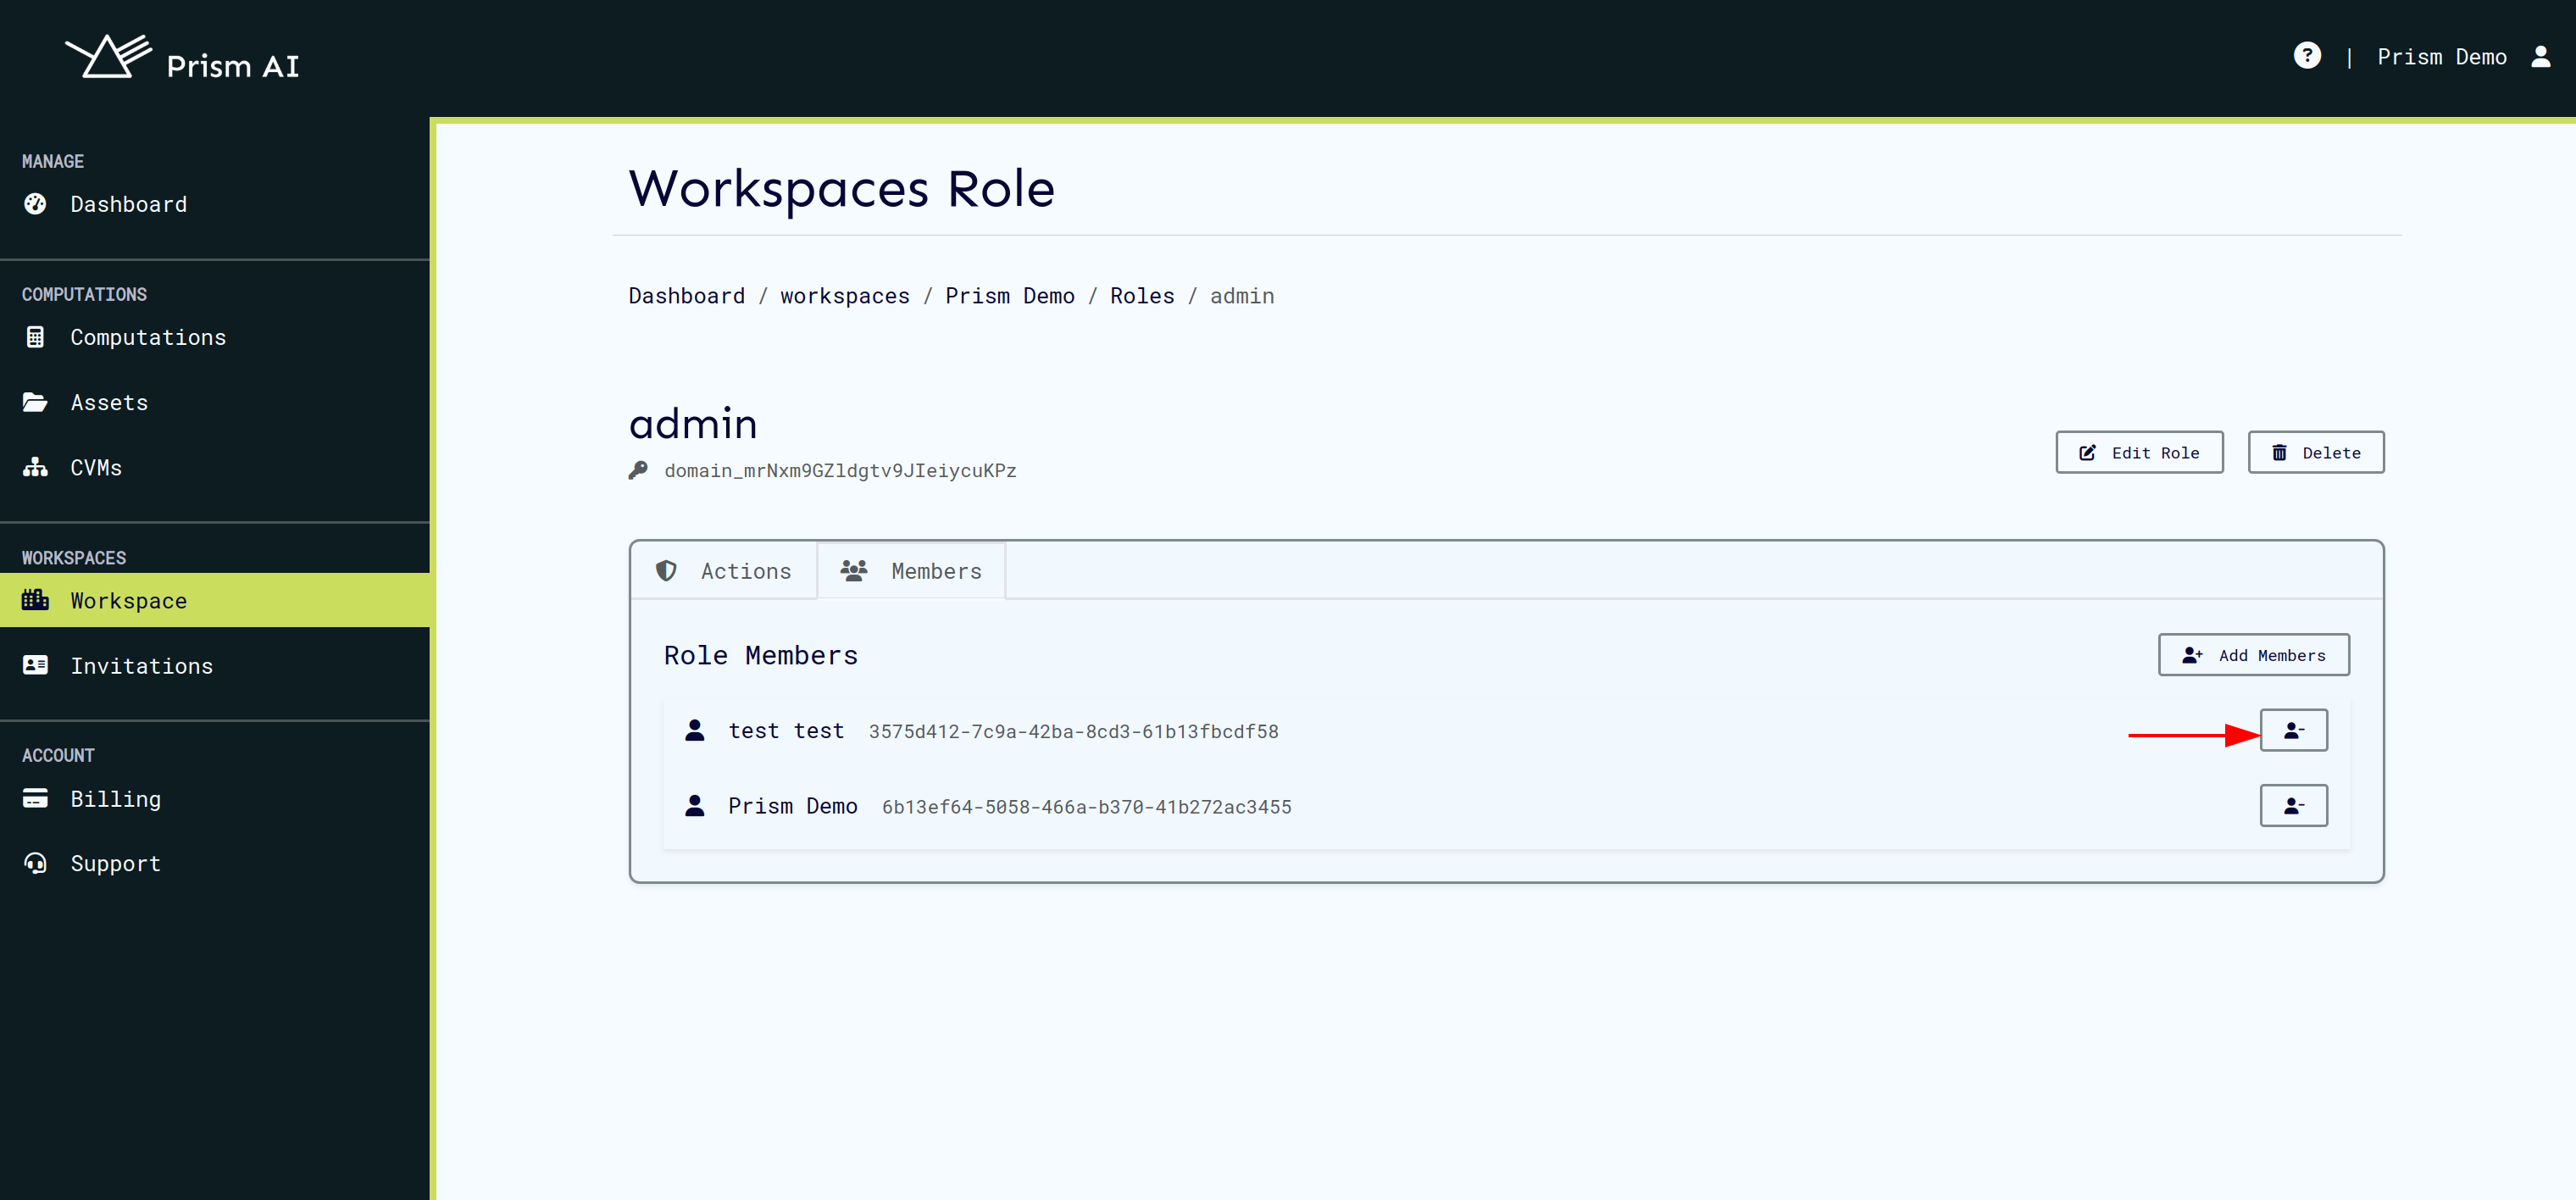
Removing a User from a Role
To revoke access, remove a user from a role:
- Navigate to the role’s details page.
- Locate the user in the Role Members section.
- Click the Remove button.
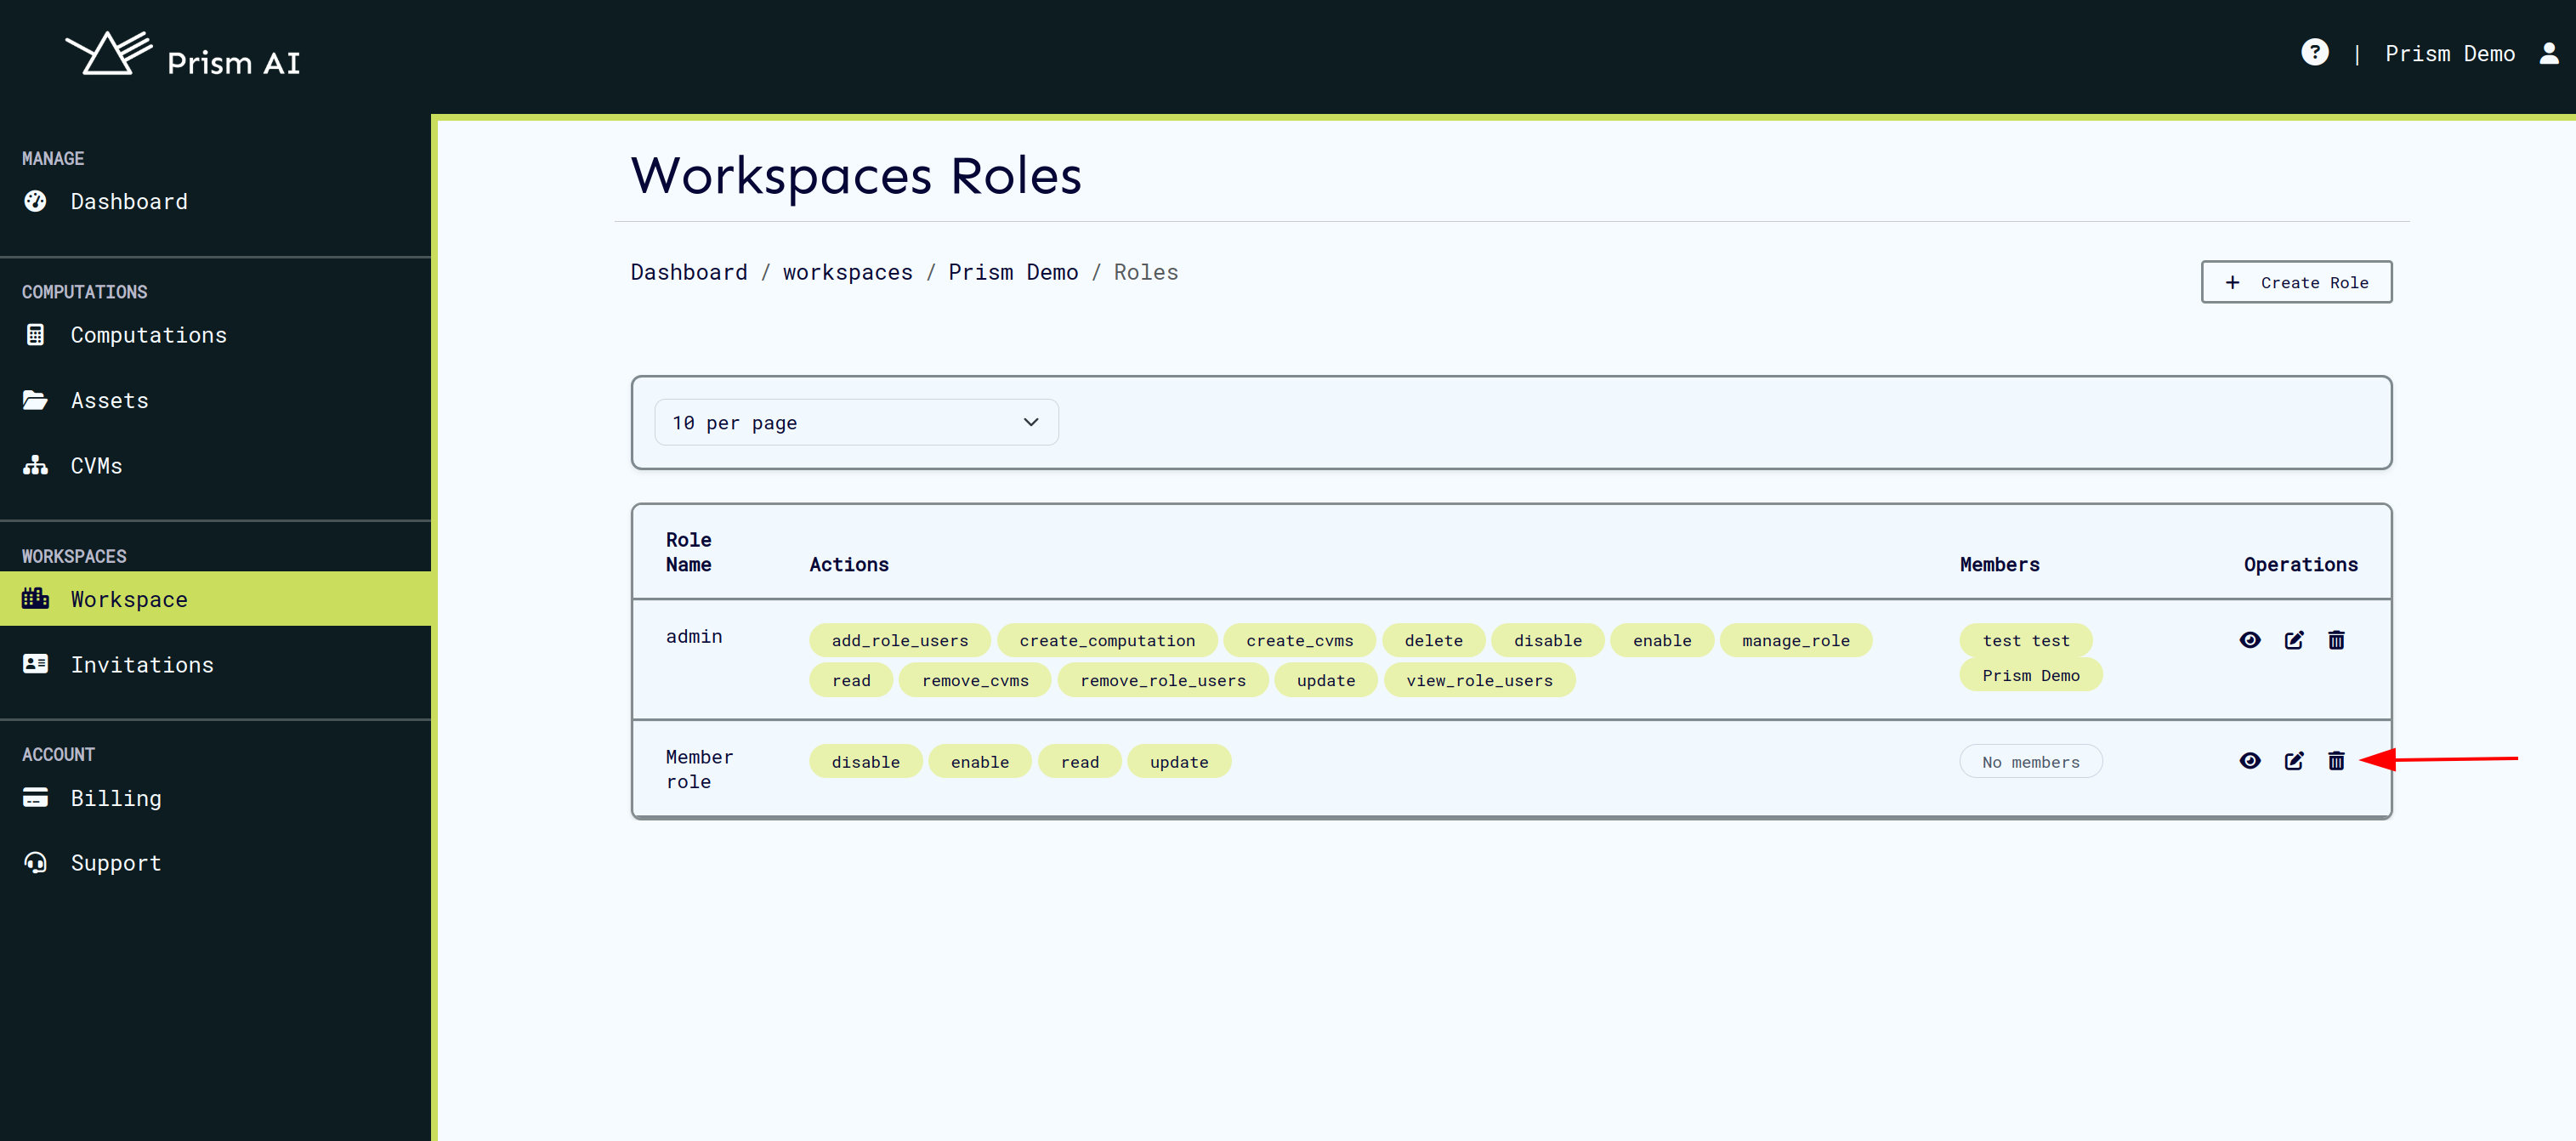
Deleting a Role
Roles that are no longer needed can be removed. Note: Deleting a role will revoke access for all assigned users.
- Click the Delete Role button next to the role.
- Confirm the deletion.