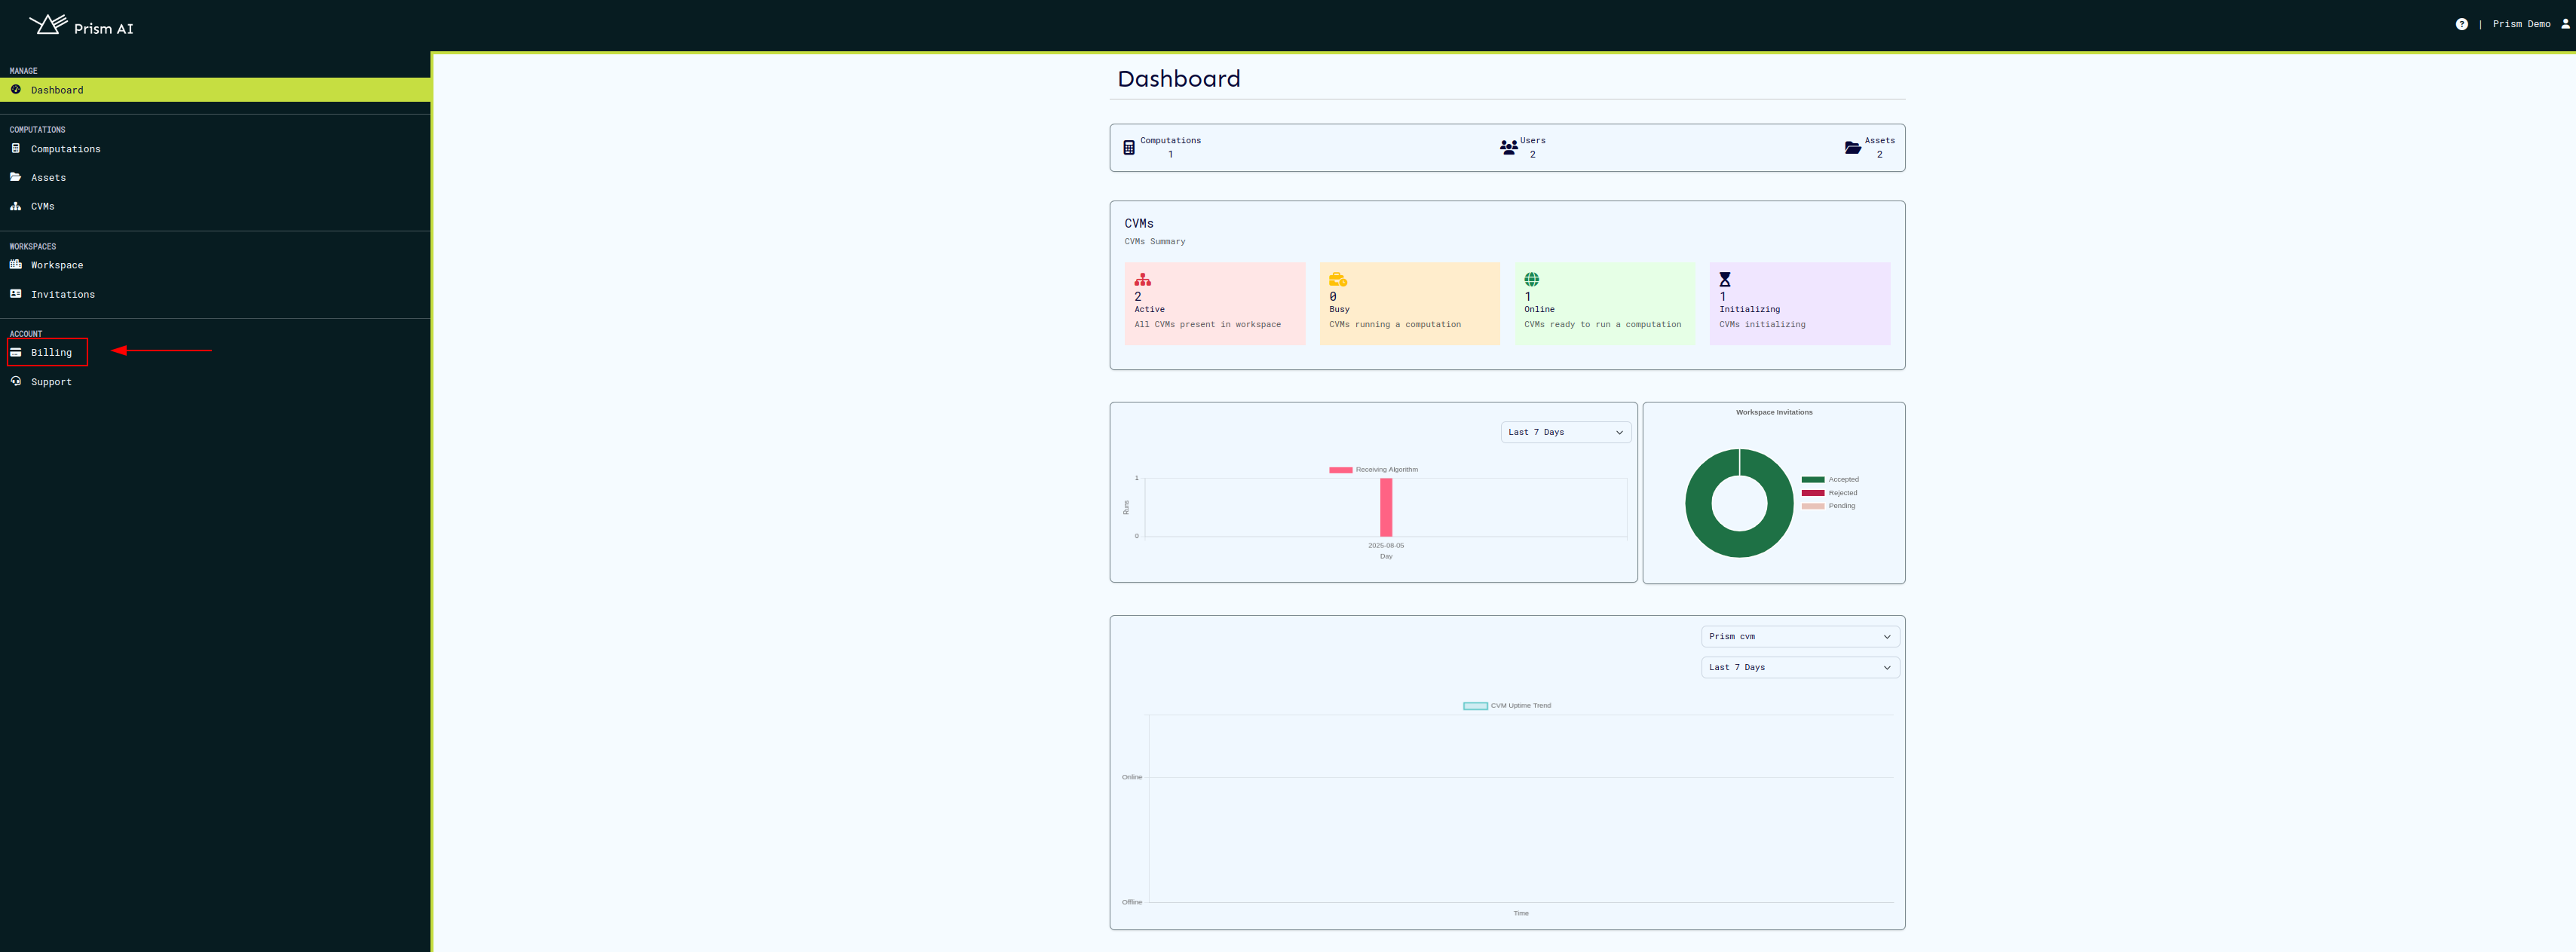
Billing
To perform operations on the platform, a billing account has to be set up and a billing plan subscribed to. Available plans can be found on the pricing page. By default, a free plan is available which allows for limited usage of the platform. To access more features and resources, you can subscribe to one of the paid plans.
Setting up a billing account
To set up a billing account, follow these steps:
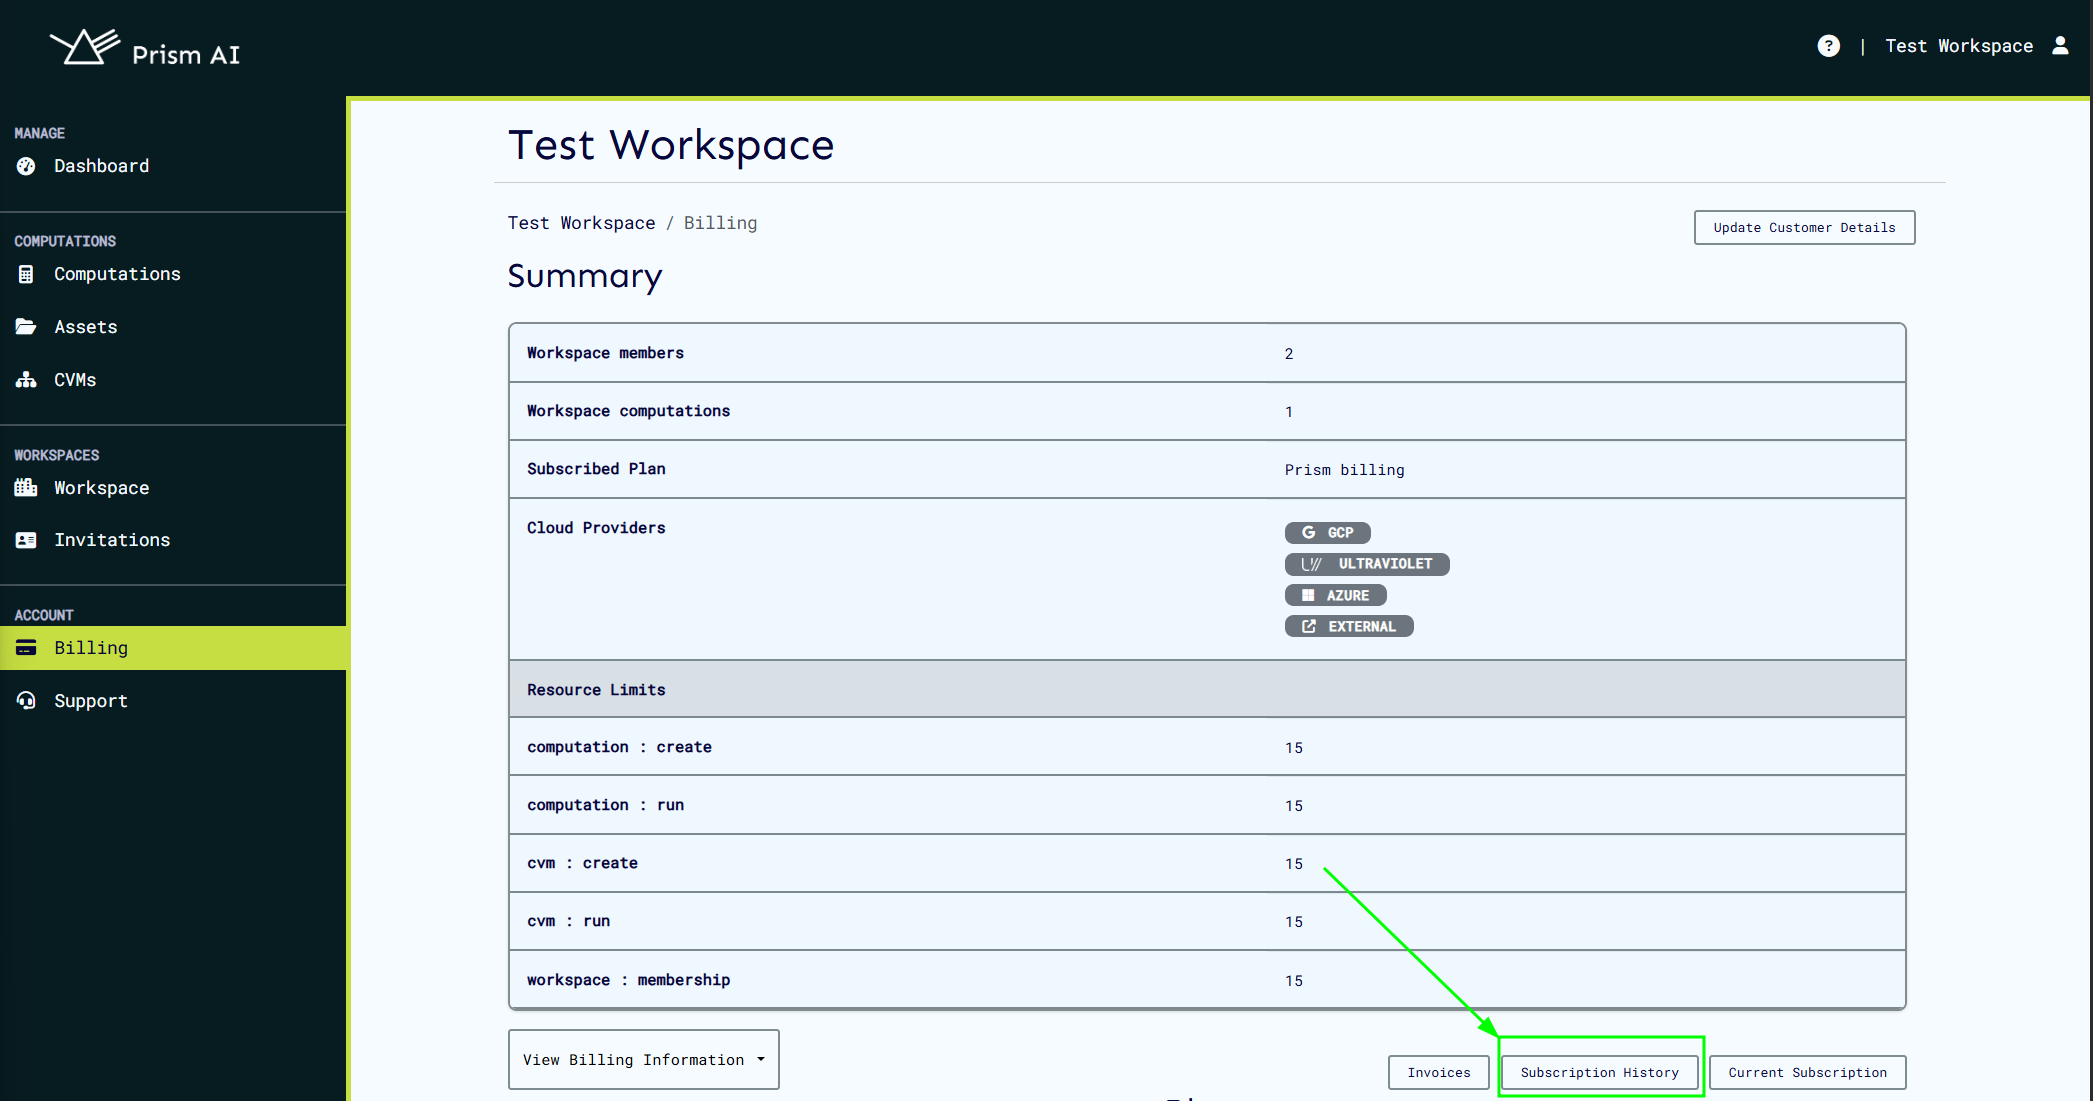
- After registration to the platform and creating a workspace, navigate to the billing section on the sidebar.
- The workspace settings page will look as shown below since no billing account has been set up yet.
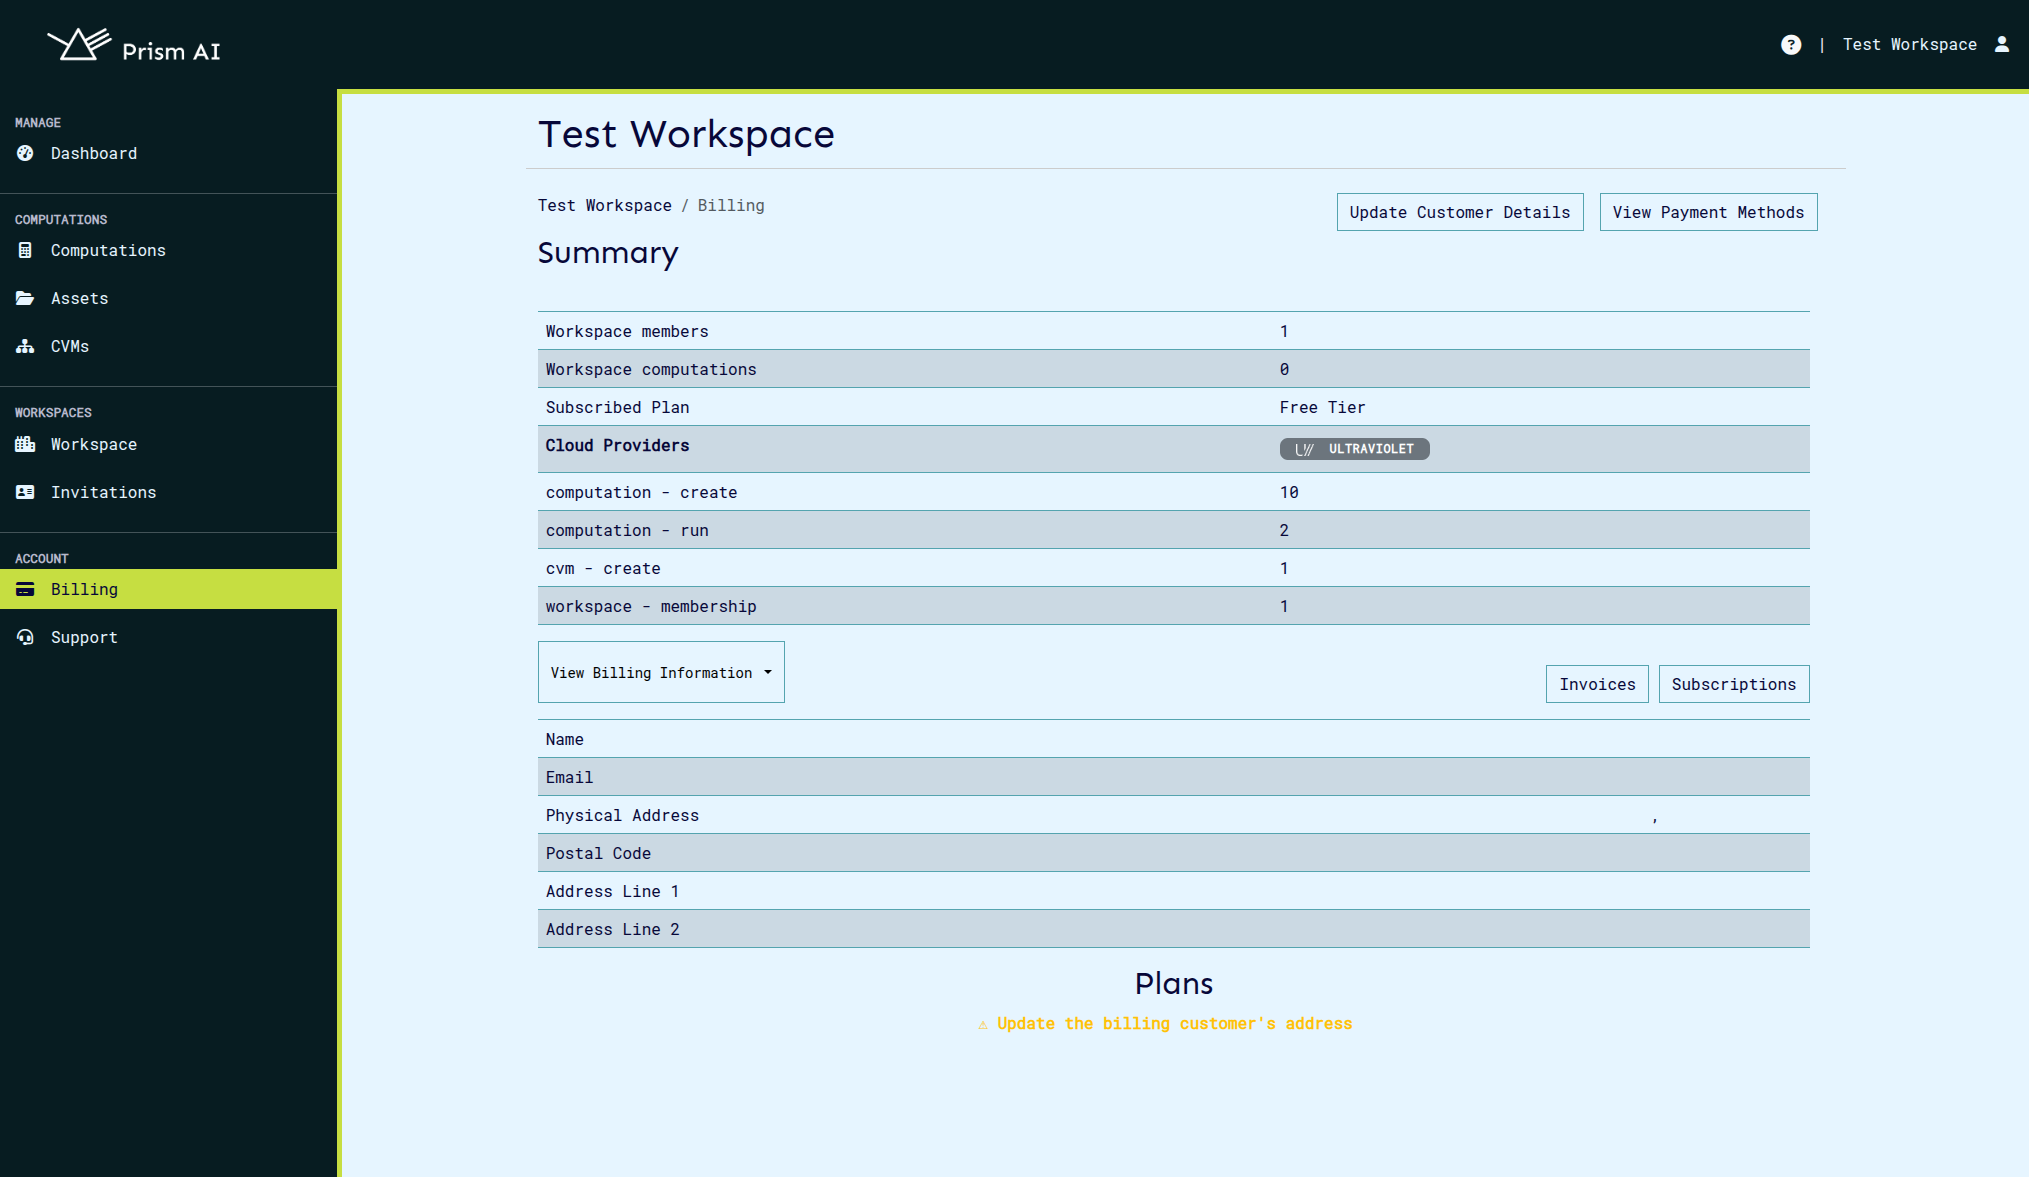
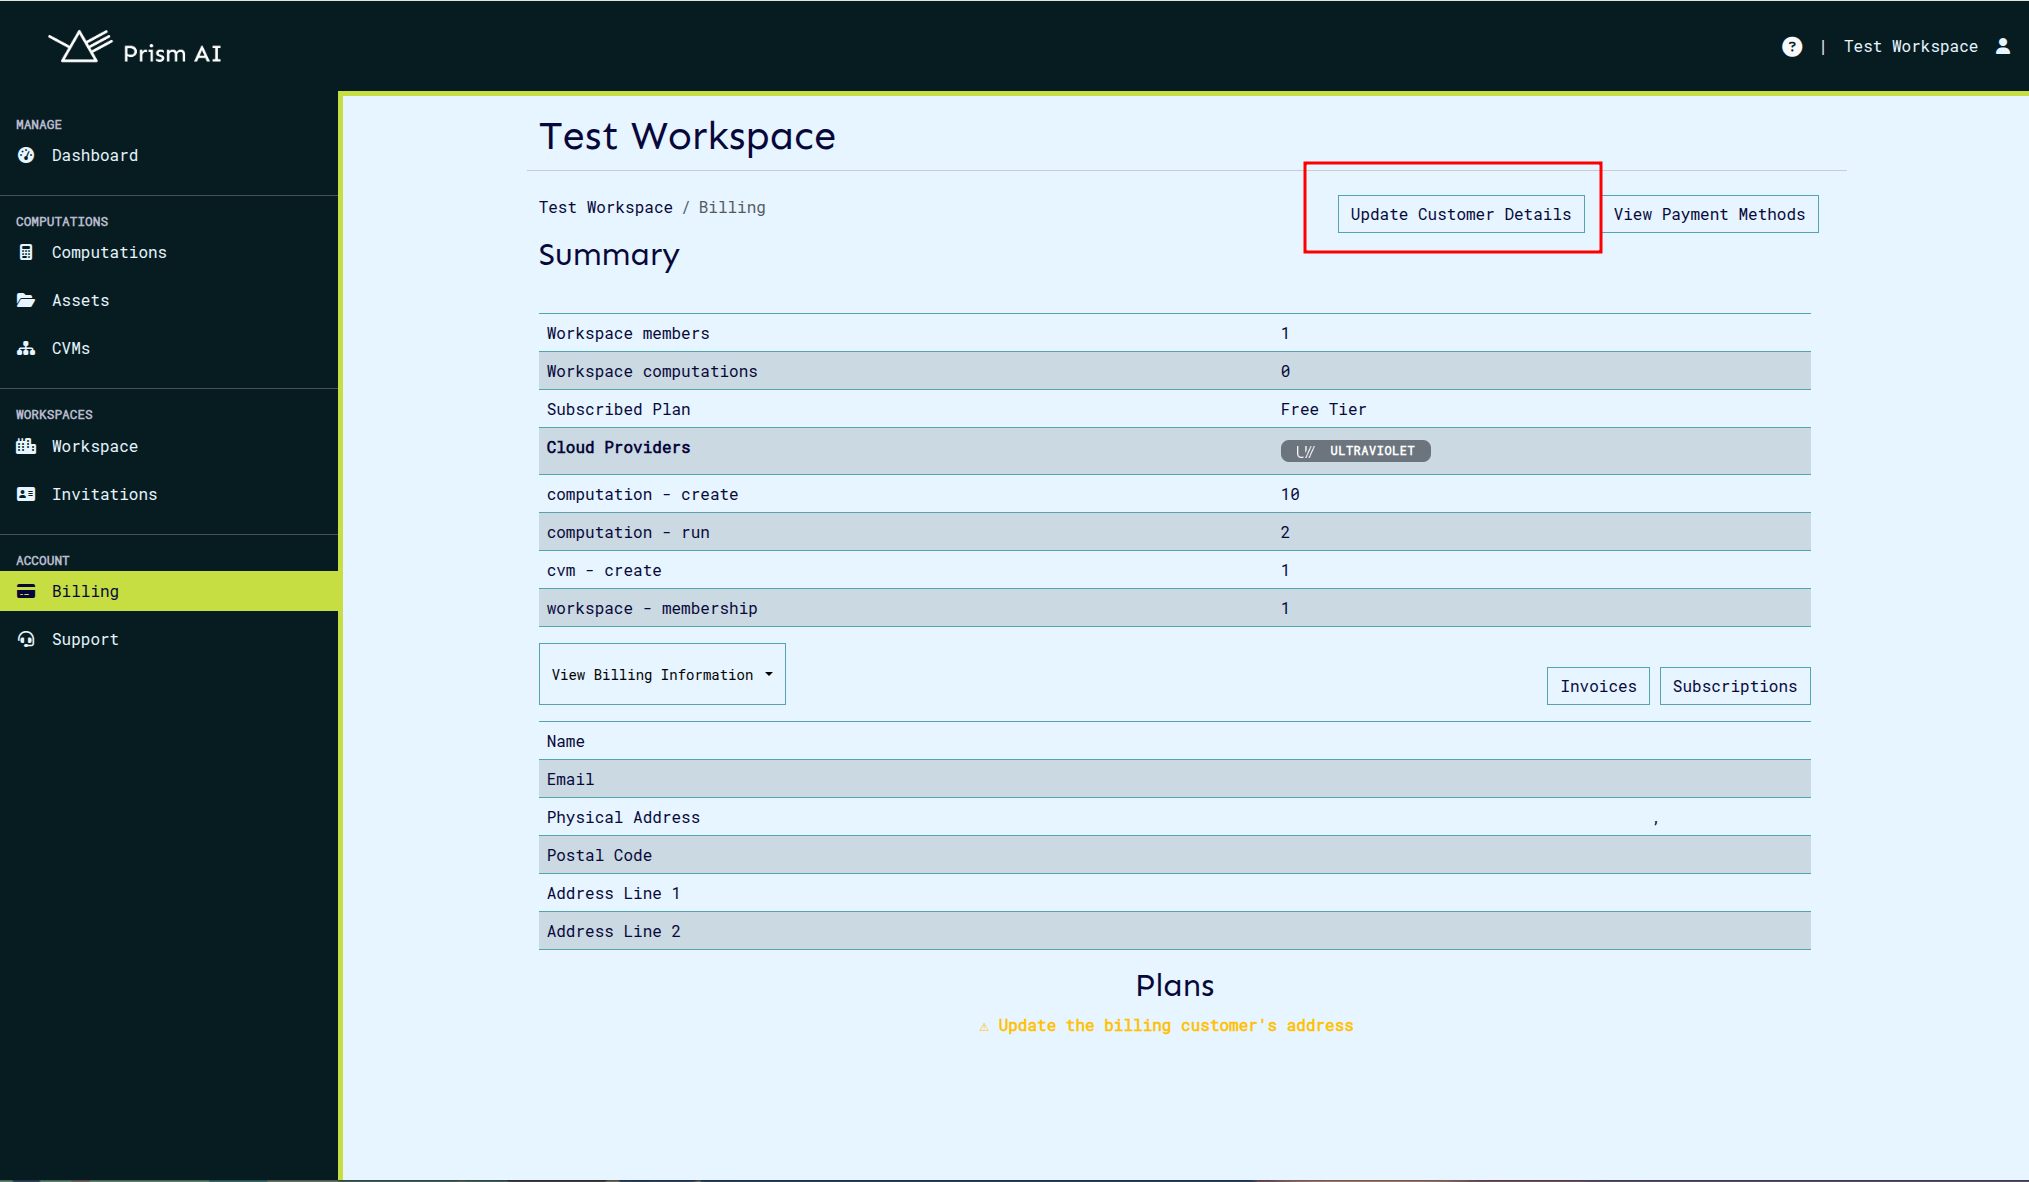
- To set up a billing account, click on the "Update Customer Details" button on the top right corner of the page.
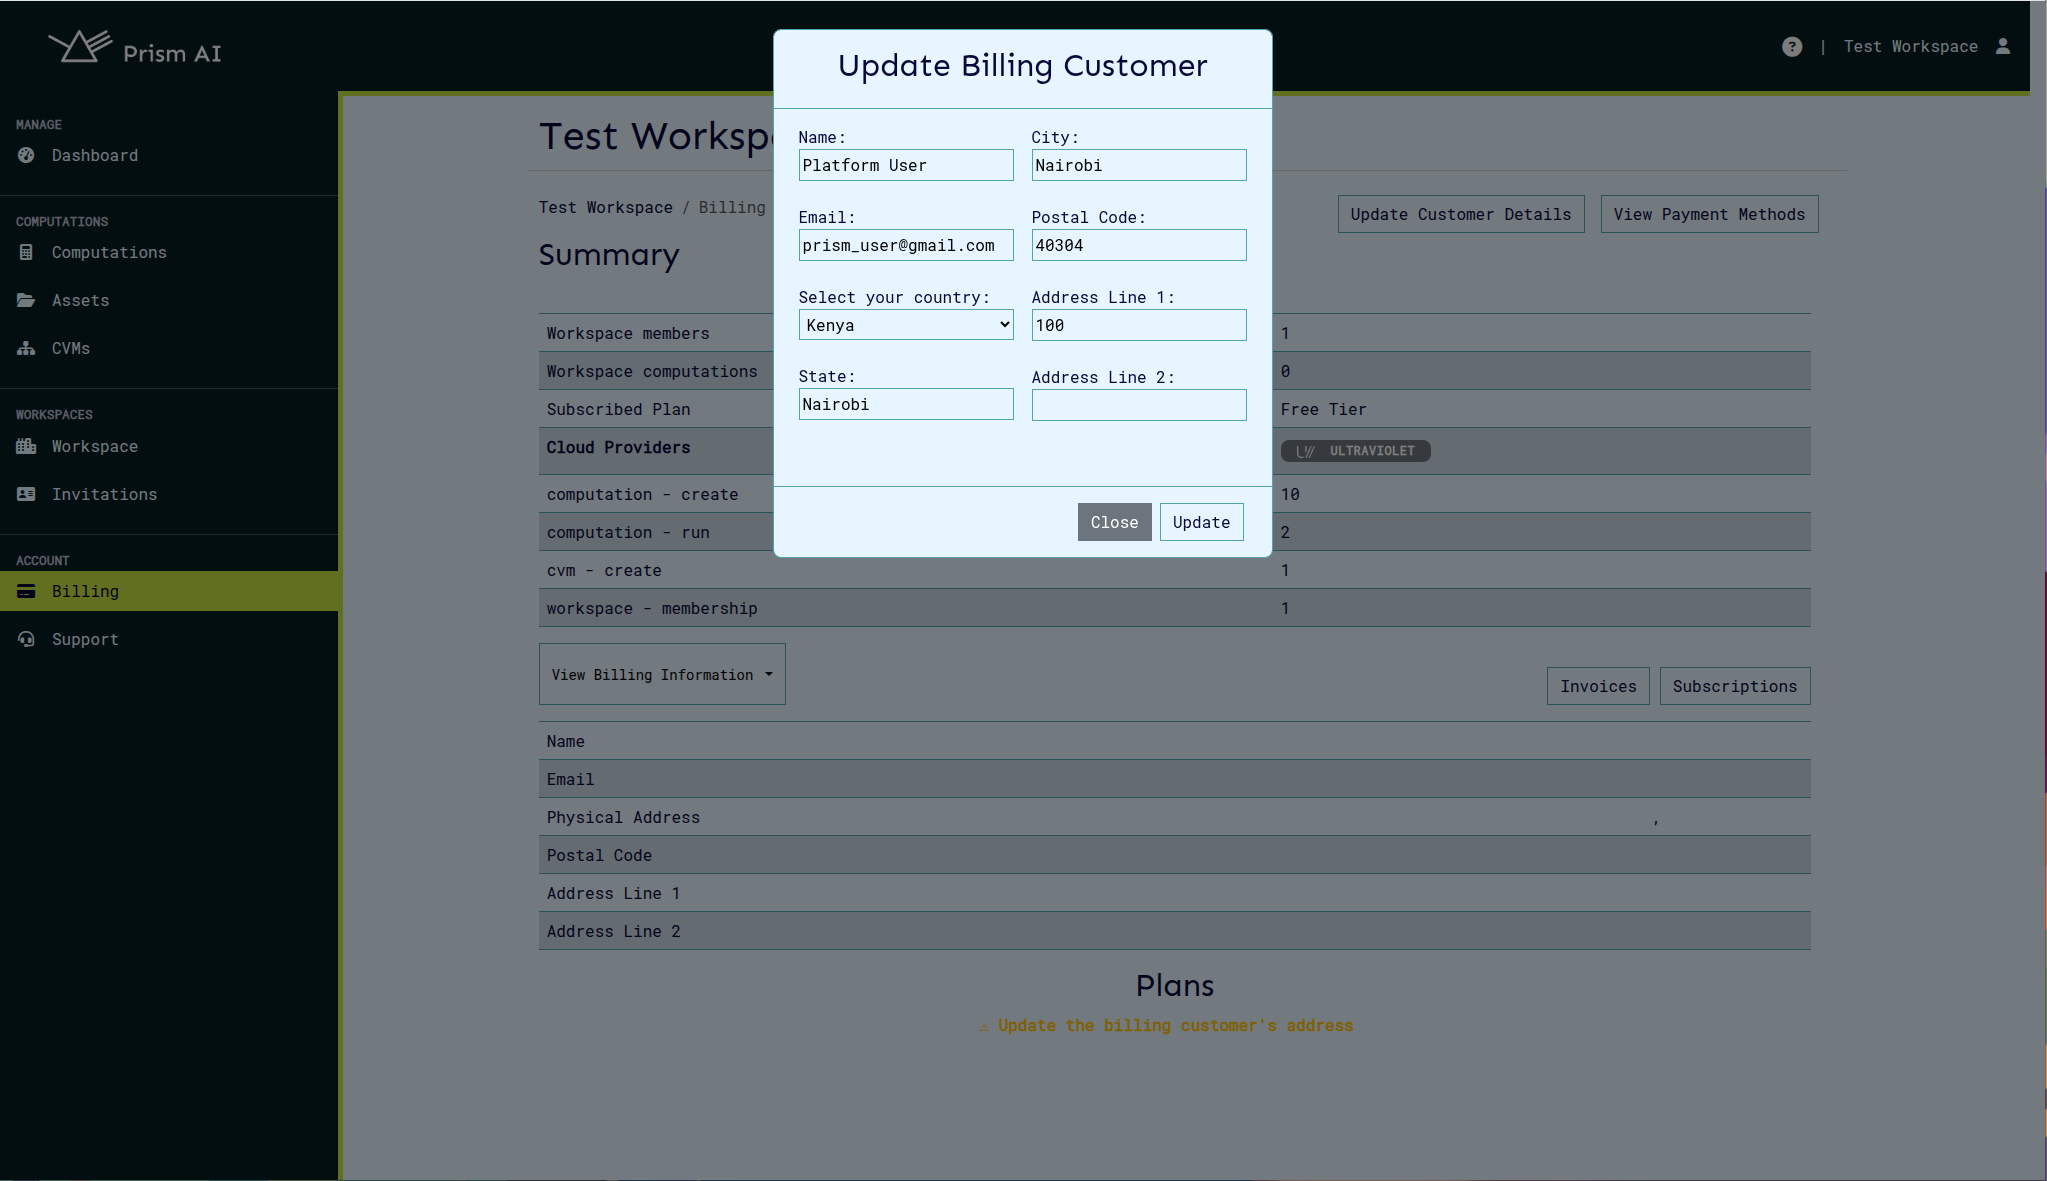
- This will open a form where you can enter your billing details. Fill in the required fields such as name, email, and address. All fields are compulsory, including the second address line.
- After filling in the details, click on the "Update" button to create your billing account. Available plans will be displayed on the page for the logged in user to choose from.
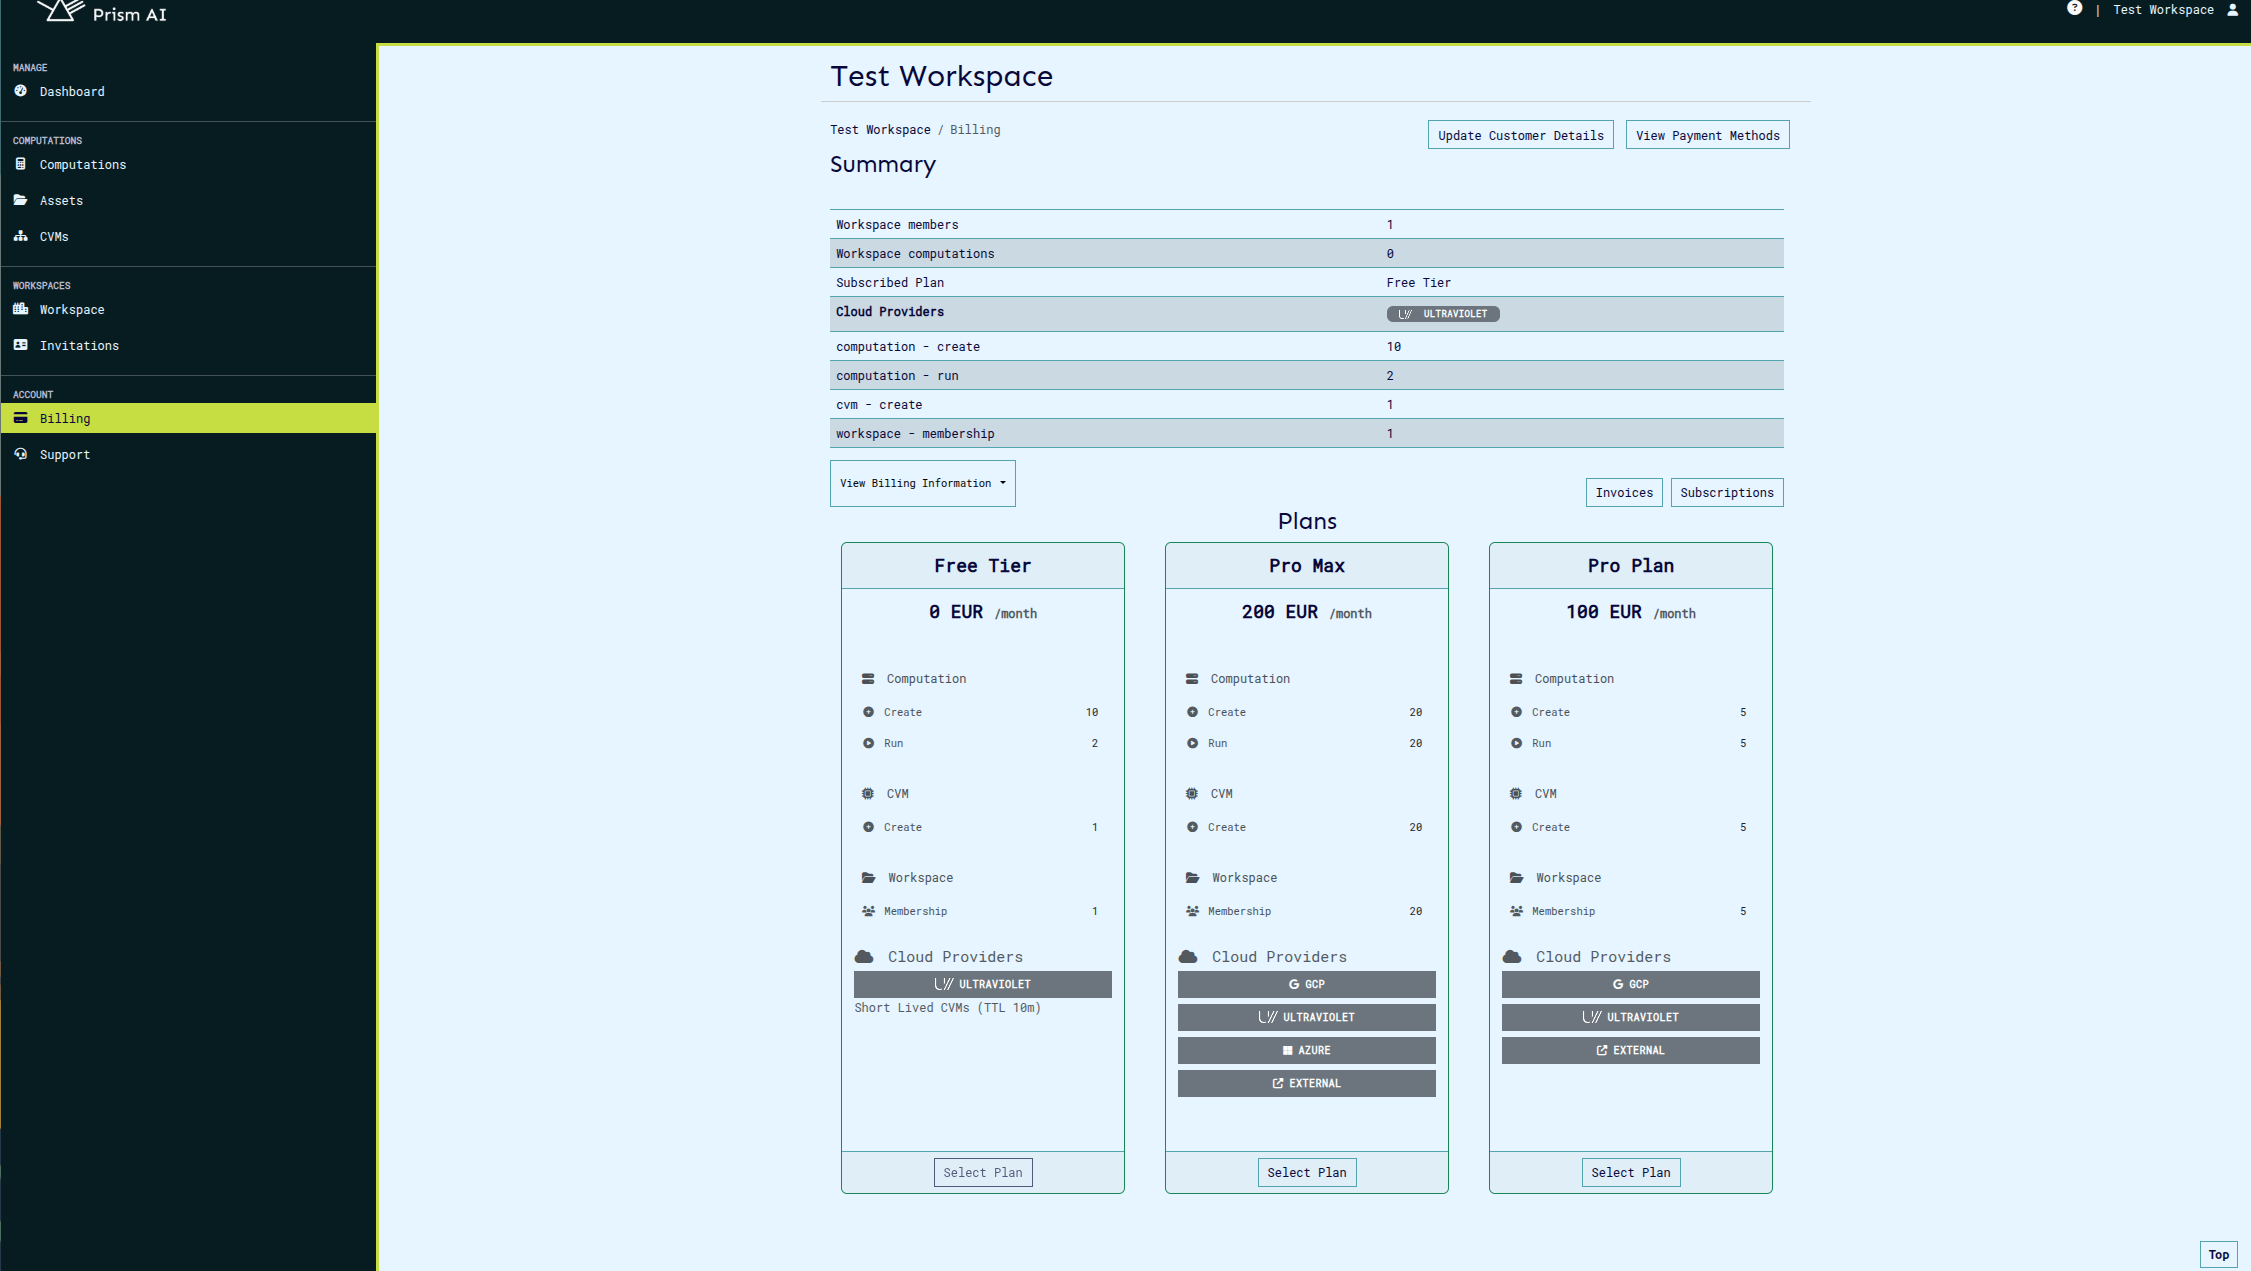
- By default, the "Free" plan is selected. To change the plan, click on a different plan among the ones listed on the billing page.
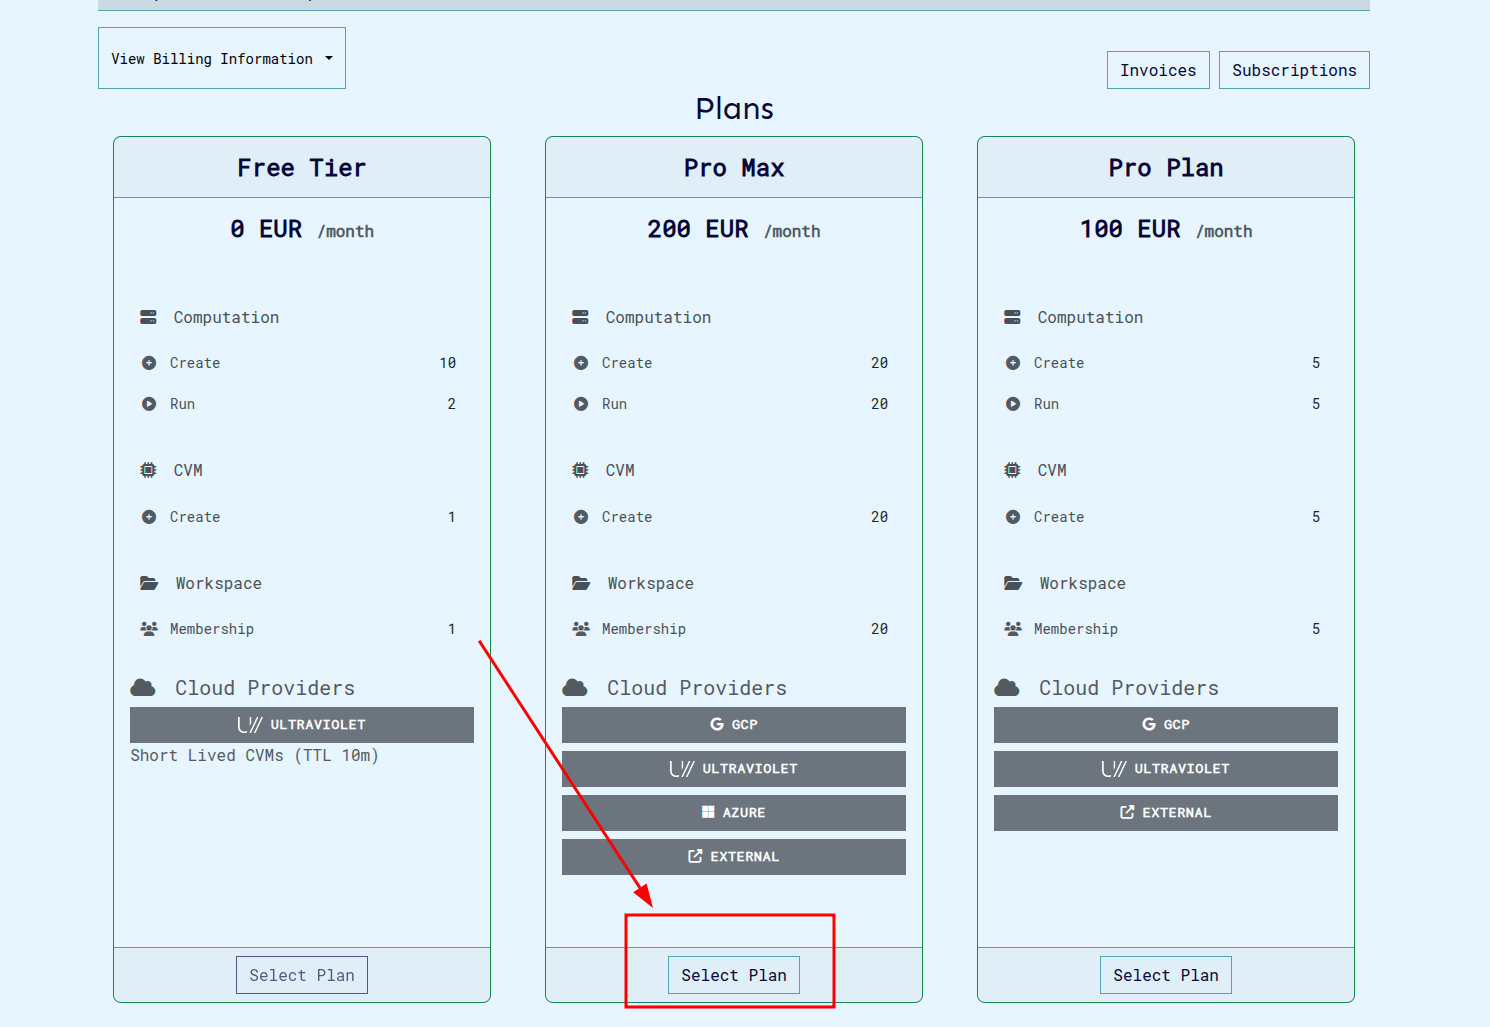
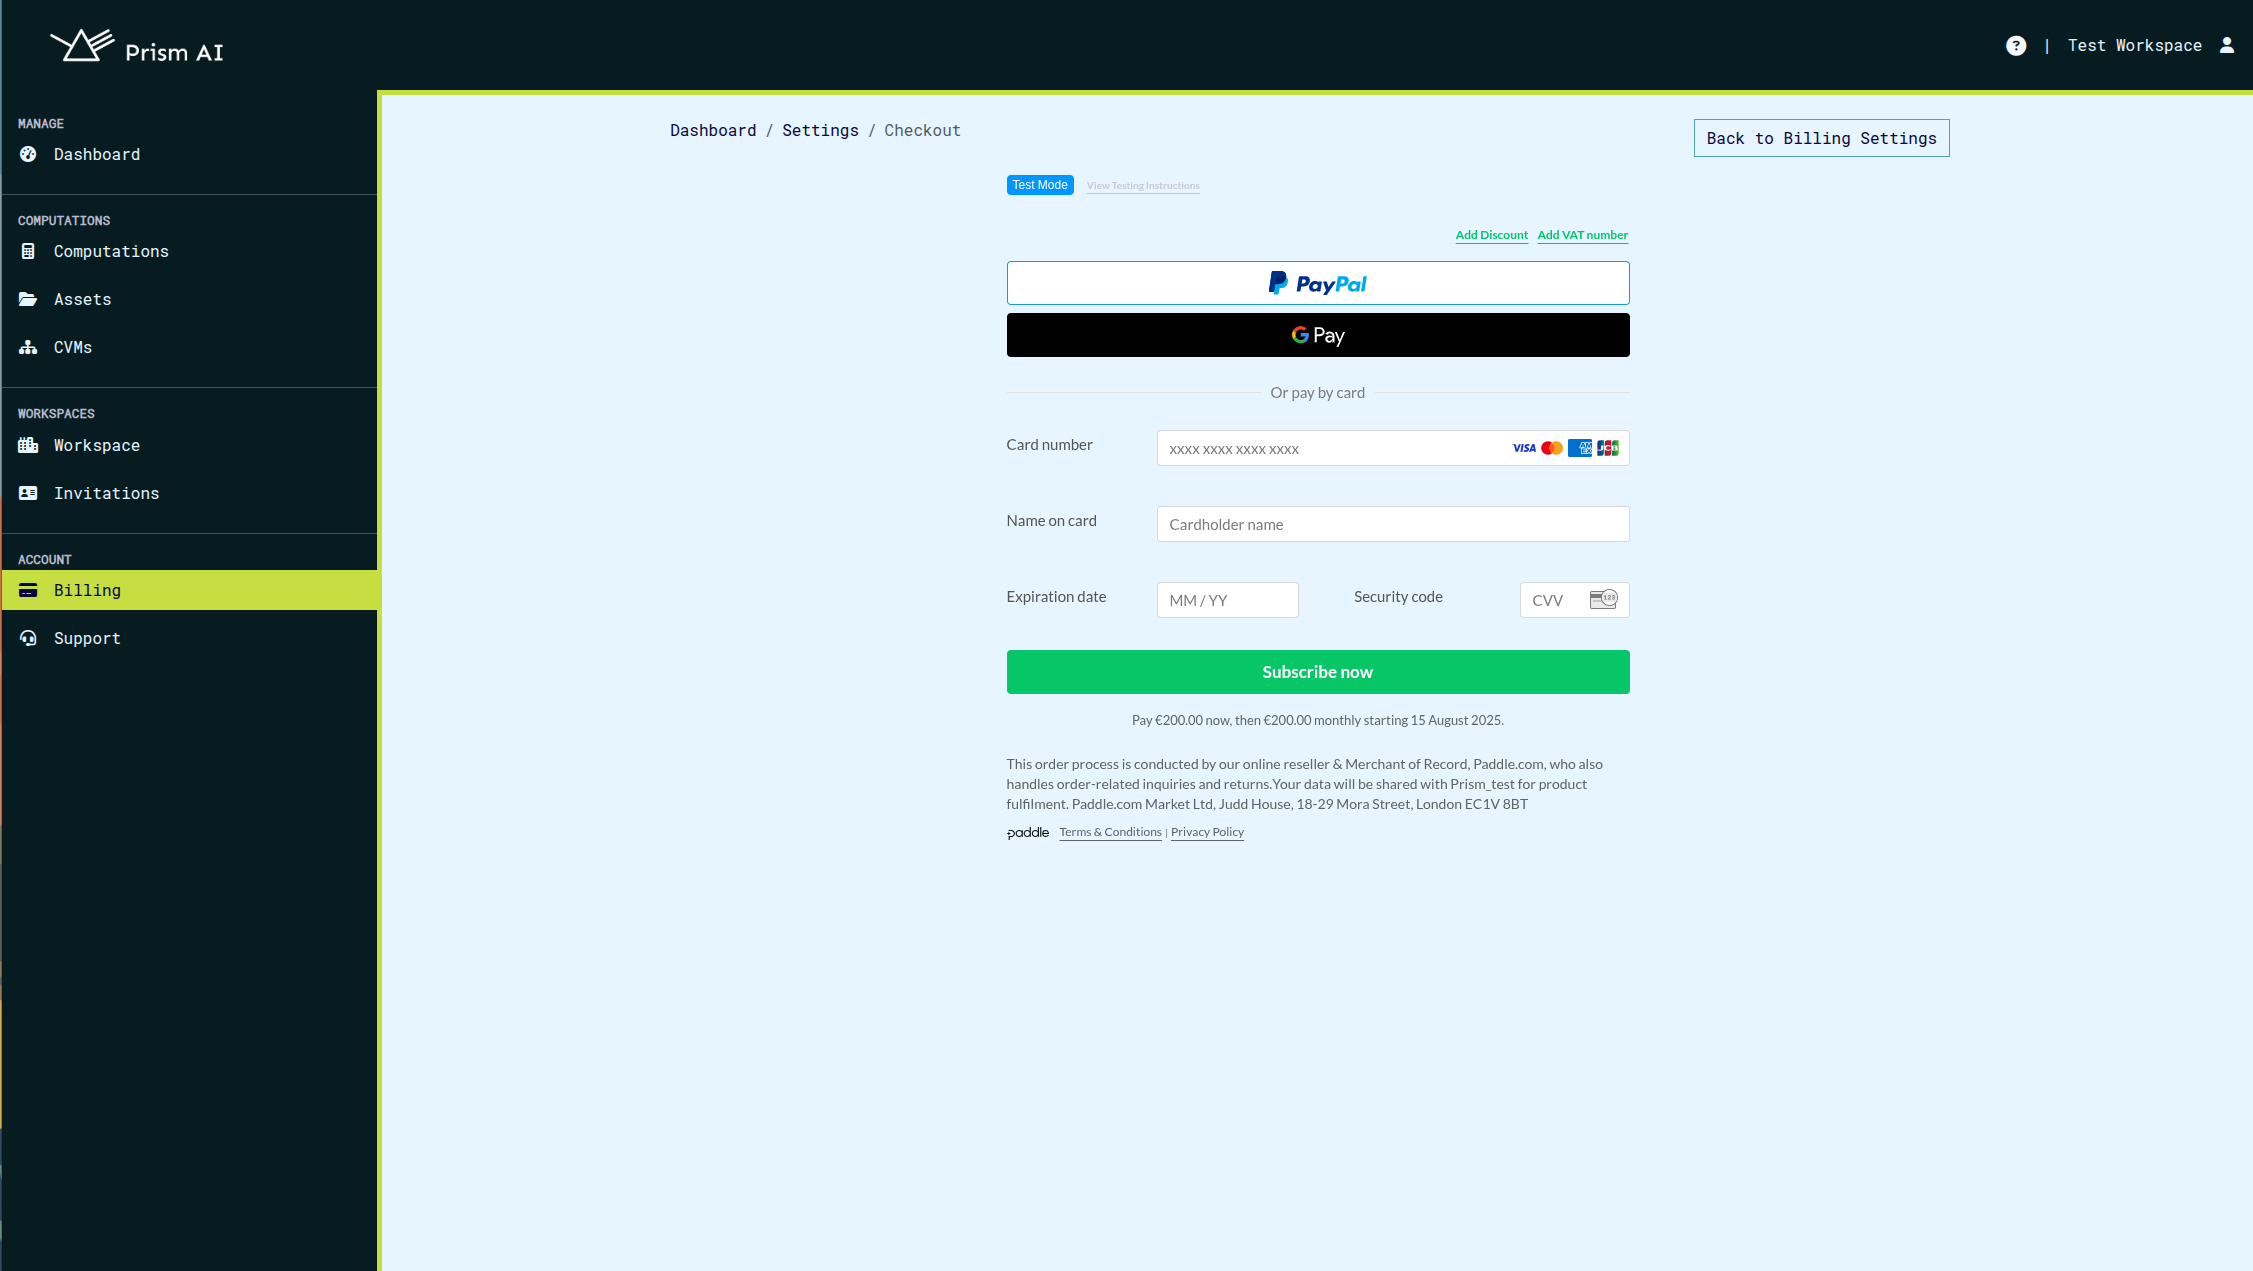
- After selecting a plan, you will be prompted to enter your payment details. Fill in the required fields for the payment method you choose (credit card, PayPal, etc.).
-
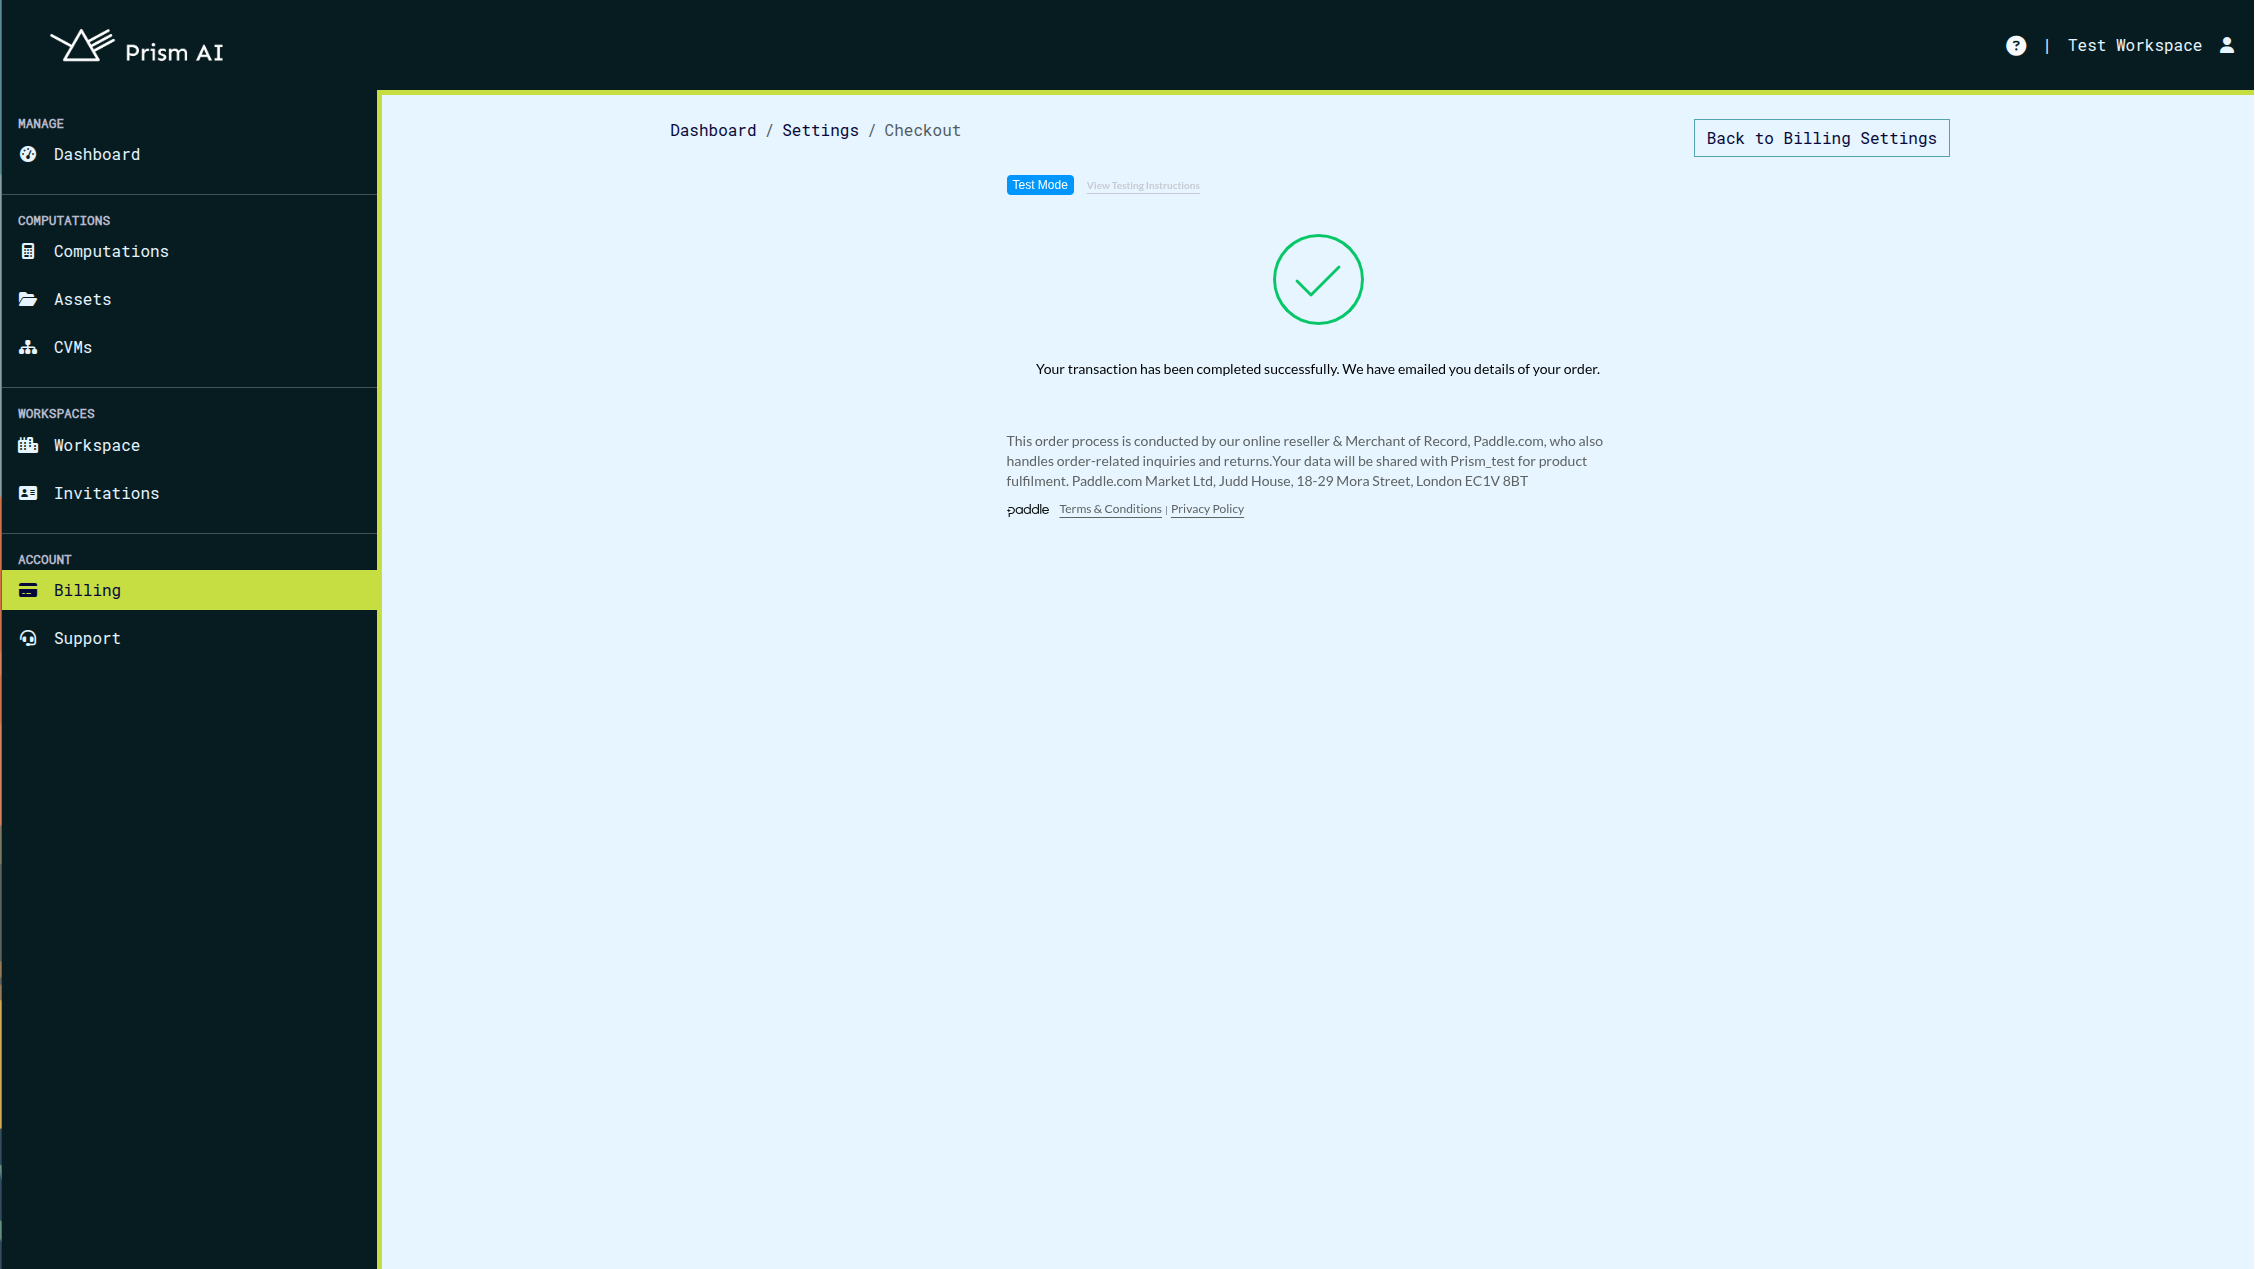
Once you have entered your payment details, click on the "Subscribe Now" button to activate your subscription.
-
This should send you an email confirming your subscription. You can now use the platform with the selected plan.
- If you ever need to change your billing details or update your payment method, you can return to the billing section and click on the "Update Customer Details" button again.
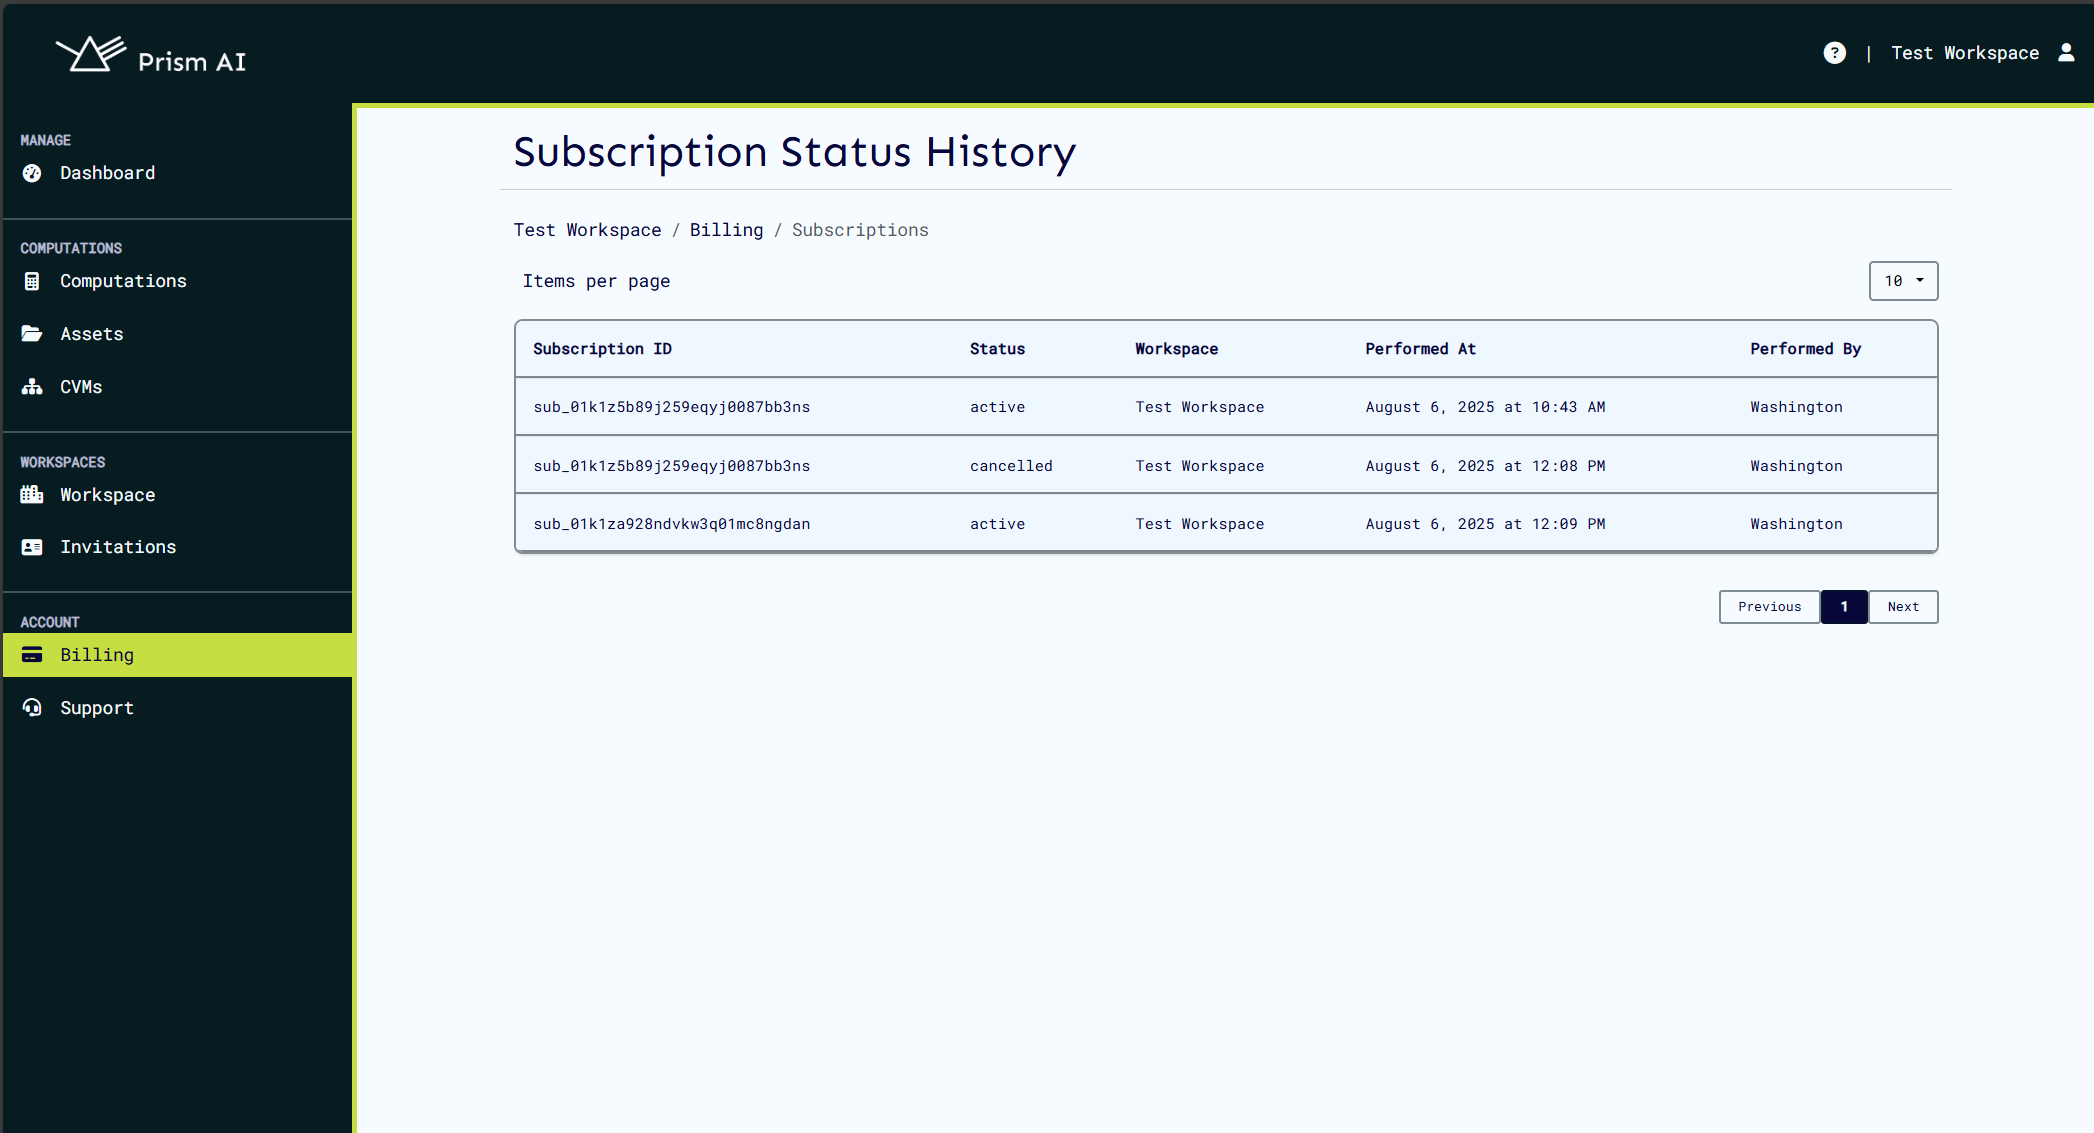
Viewing Subscription Status History
Past records of the current workspace's status can be found on the subscription status history page, which can be accessed when the 'Subscription History' button is clicked on the billing page:
The subsequent status history page will be opened where all information about the status changes of the subscription will be shown:
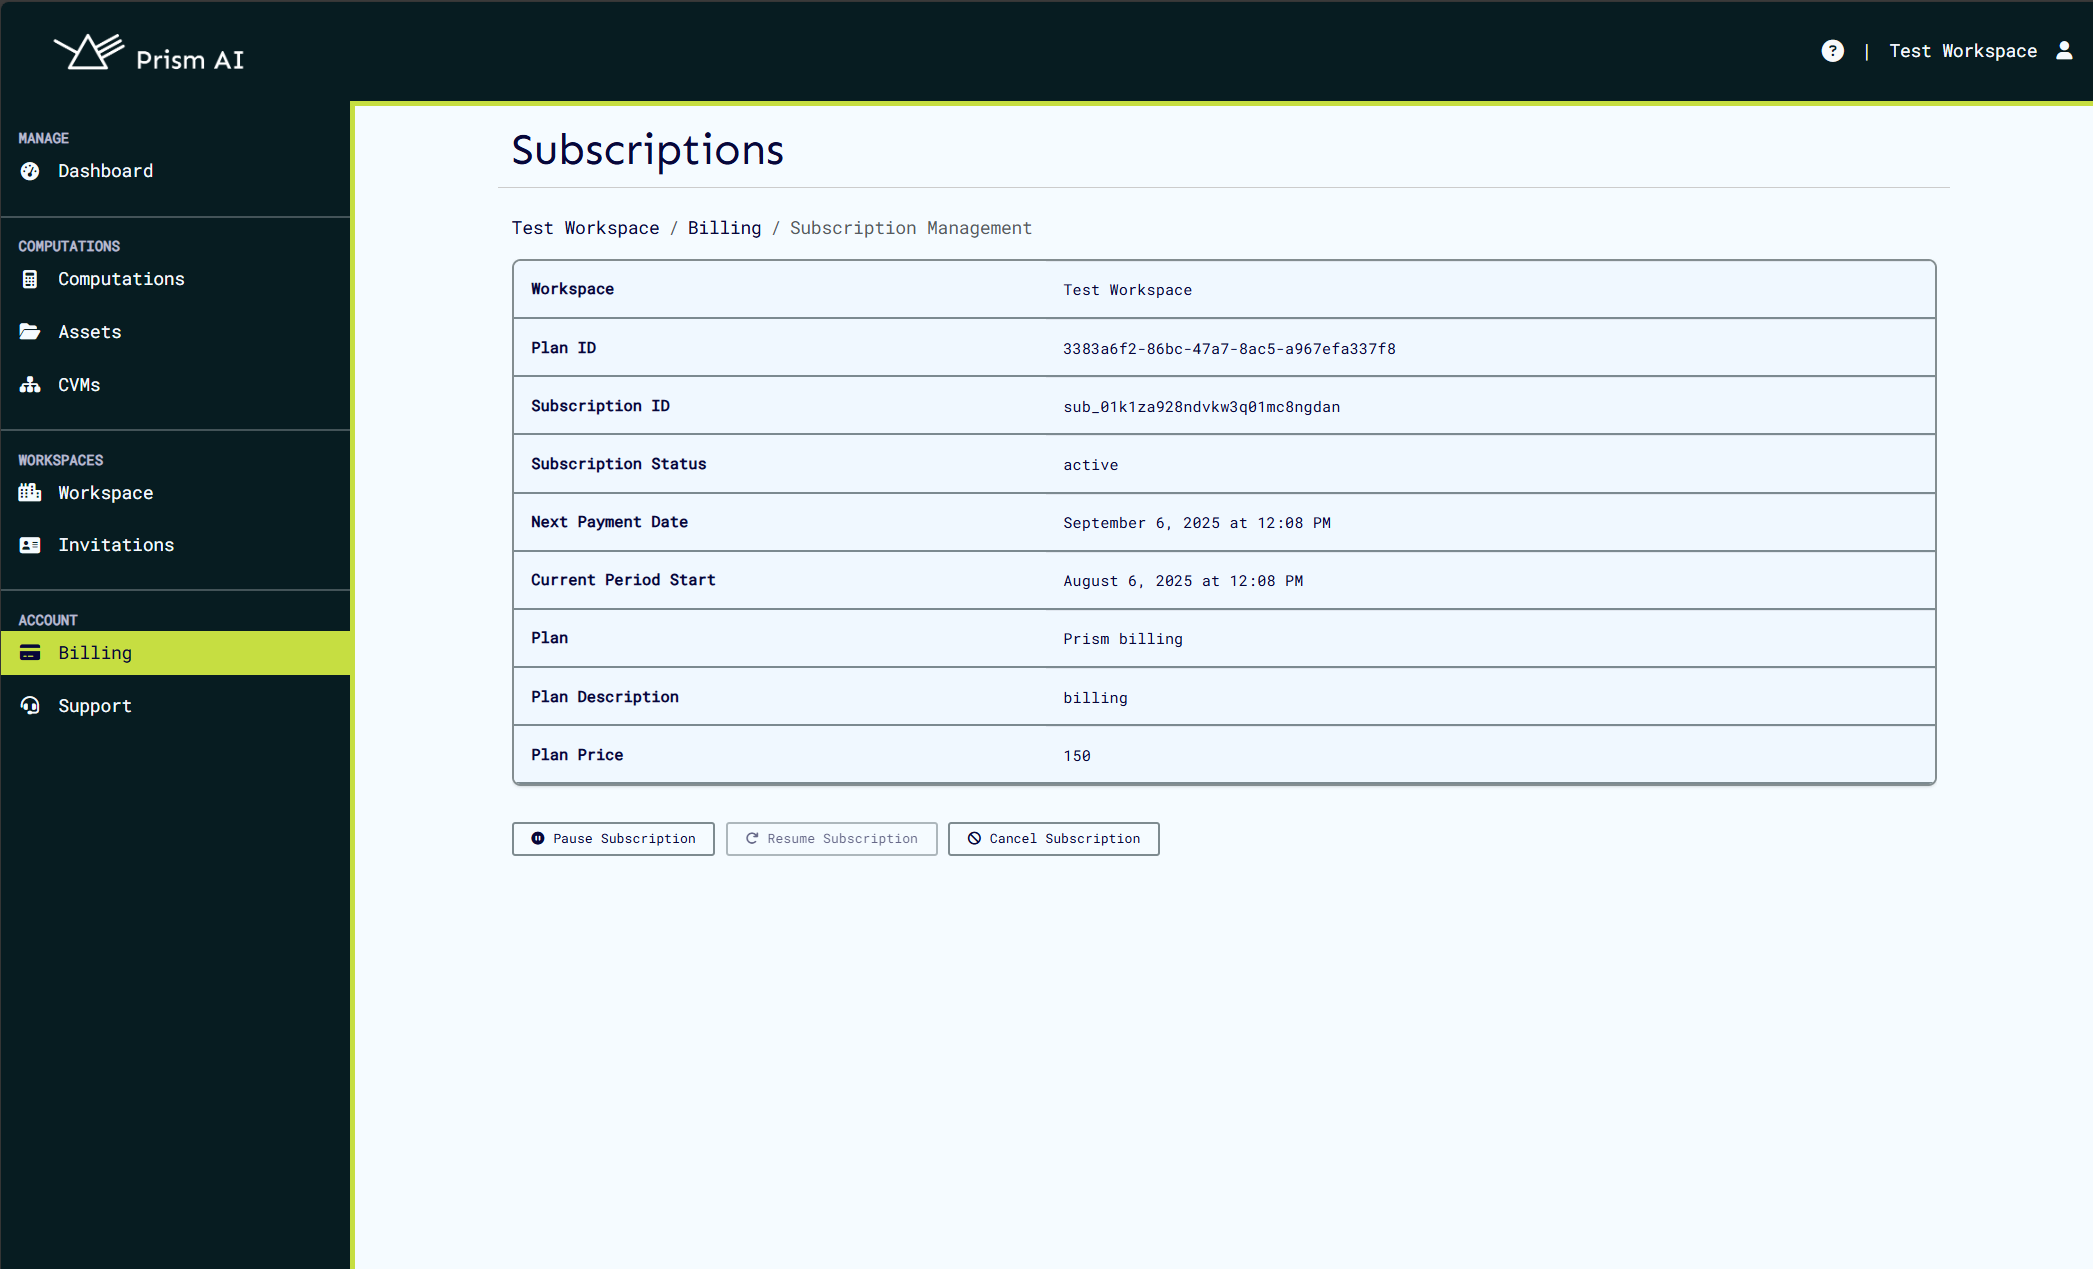
Subscription Management
To manage your subscription, go to the billing section and click on the "Current Subscription" button. From there, you can view your current subscription, pause or resume it, and cancel if needed.
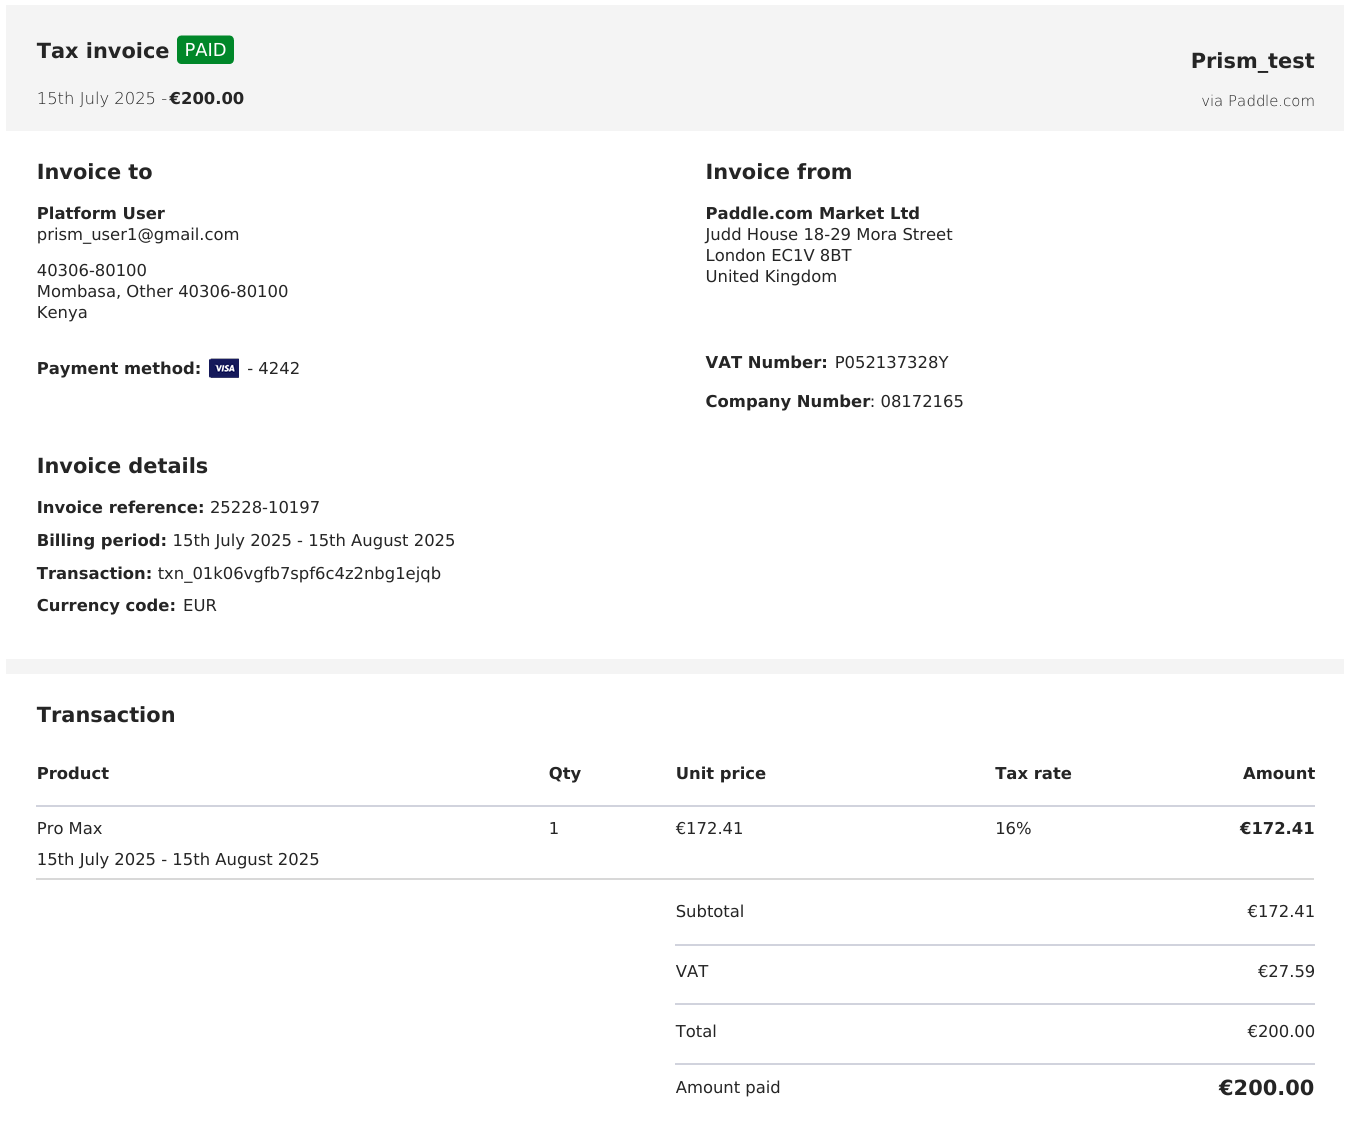
Invoice Management
To manage your invoices, navigate to the billing section and click on the "Invoices" tab. Here you can view all your past invoices, download them as PDFs, and check the status of each invoice.
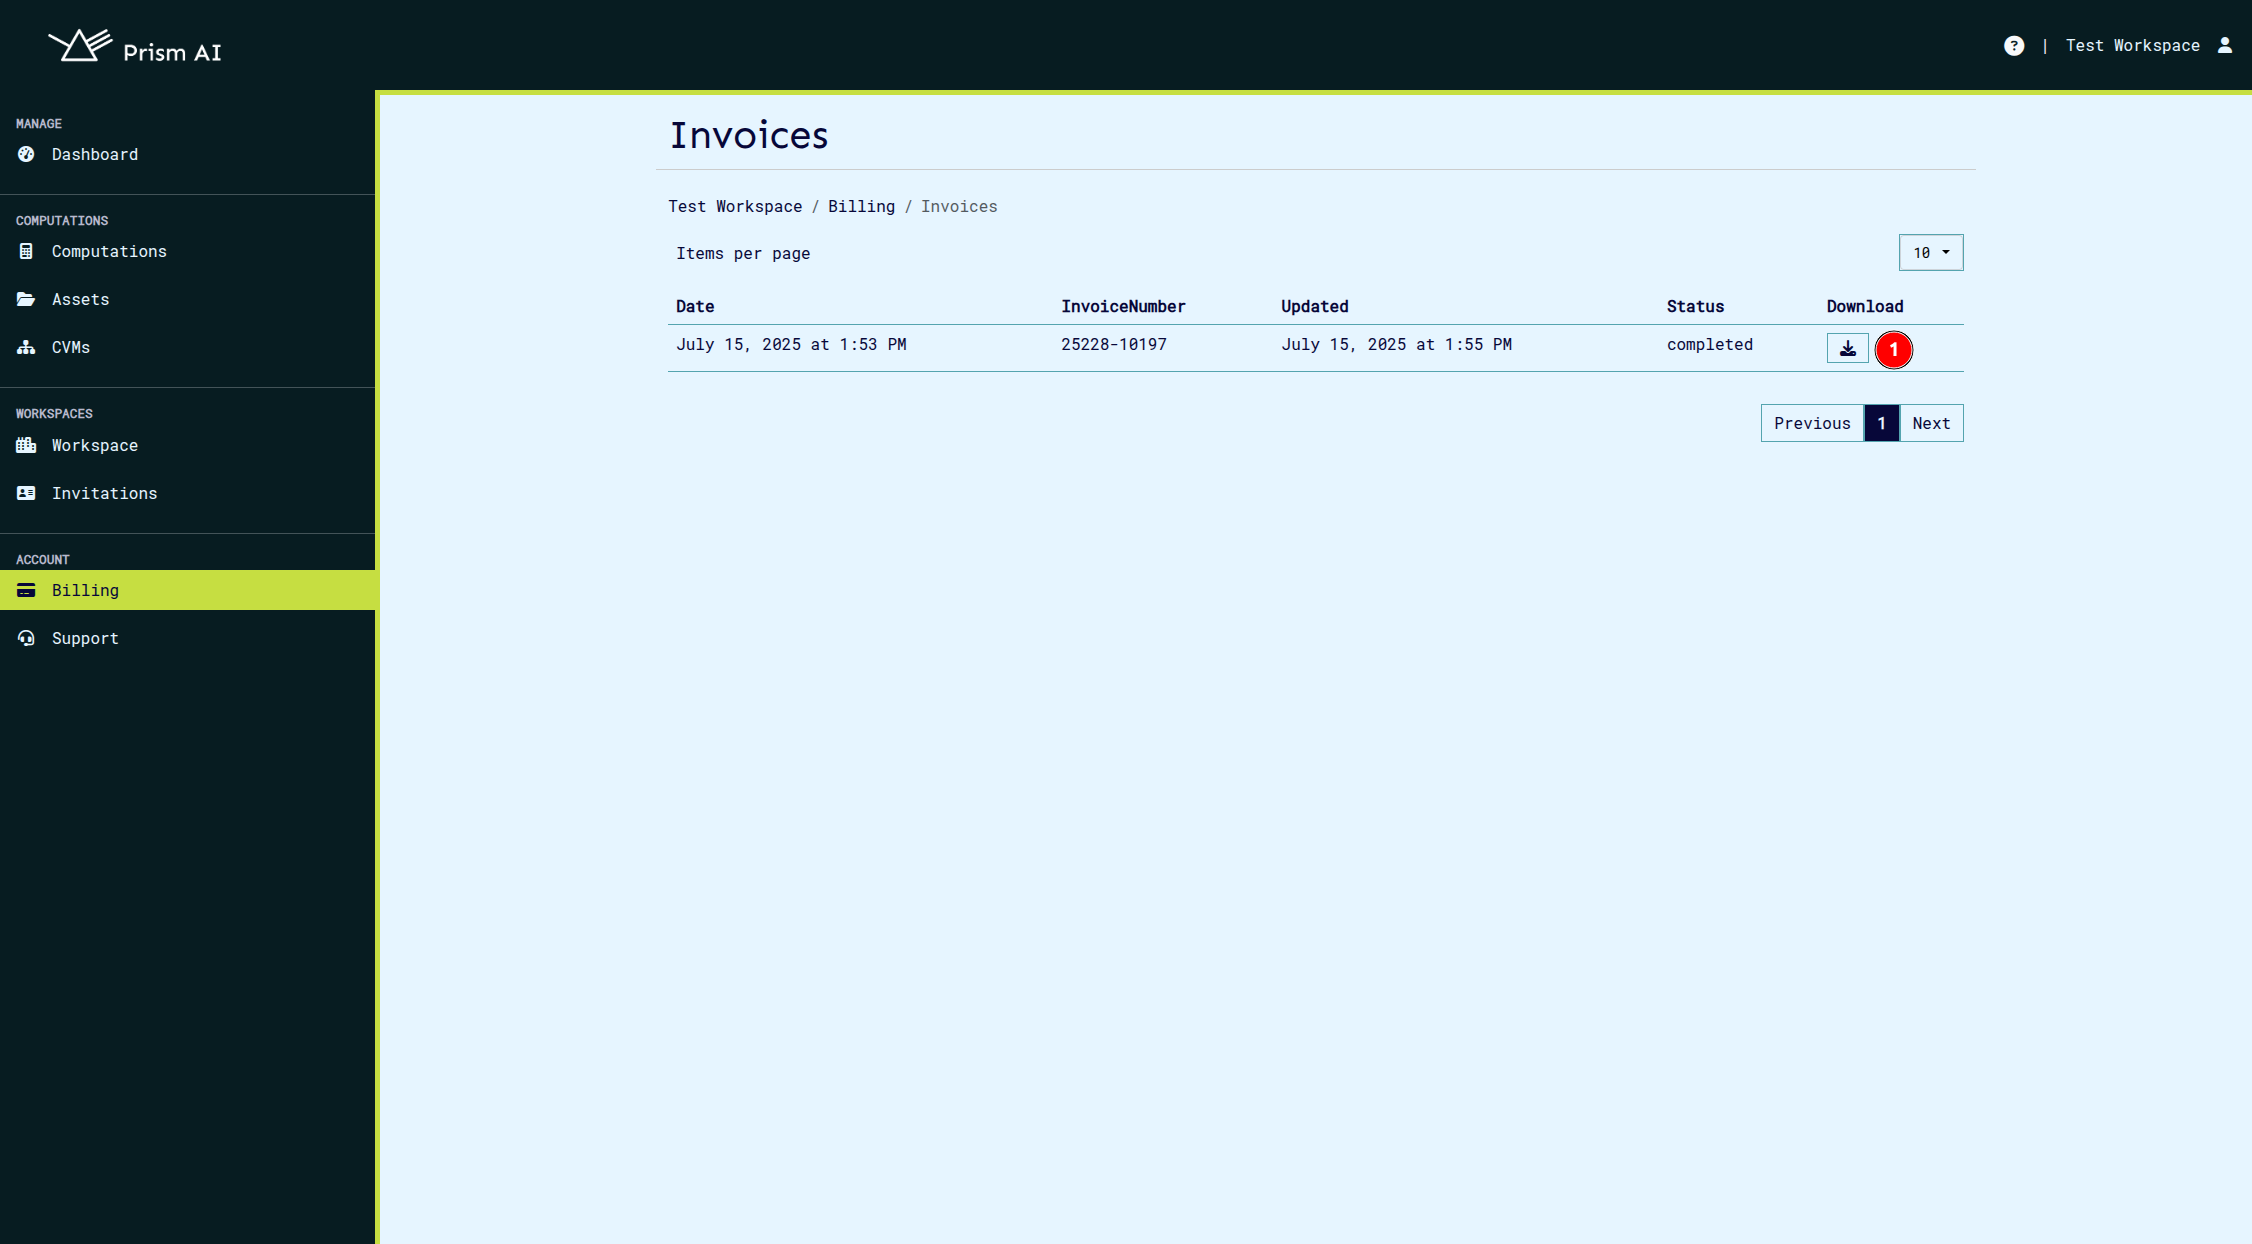
A sample invoice is shown.
CVM Billing
Invoices for CVMs will be automatically generated and sent once each month. You can view these invoices in the "Invoices" tab of the billing section. Each invoice will detail the usage of CVMs and any associated costs.
Estimates of accrued costs for CVMs can be viewed in the CVMs page on the details of each CVM. This will give you an idea of the expected costs before the invoice is generated.
Pending payments on any CVMs will prevent you from logging in to the platform. Ensure that all invoices are paid to maintain access.
A list of unpaid invoices will be displayed on the workspaces page prior to logging in. Use the link on the invoice to pay it directly, and access the platform once the payment is confirmed.
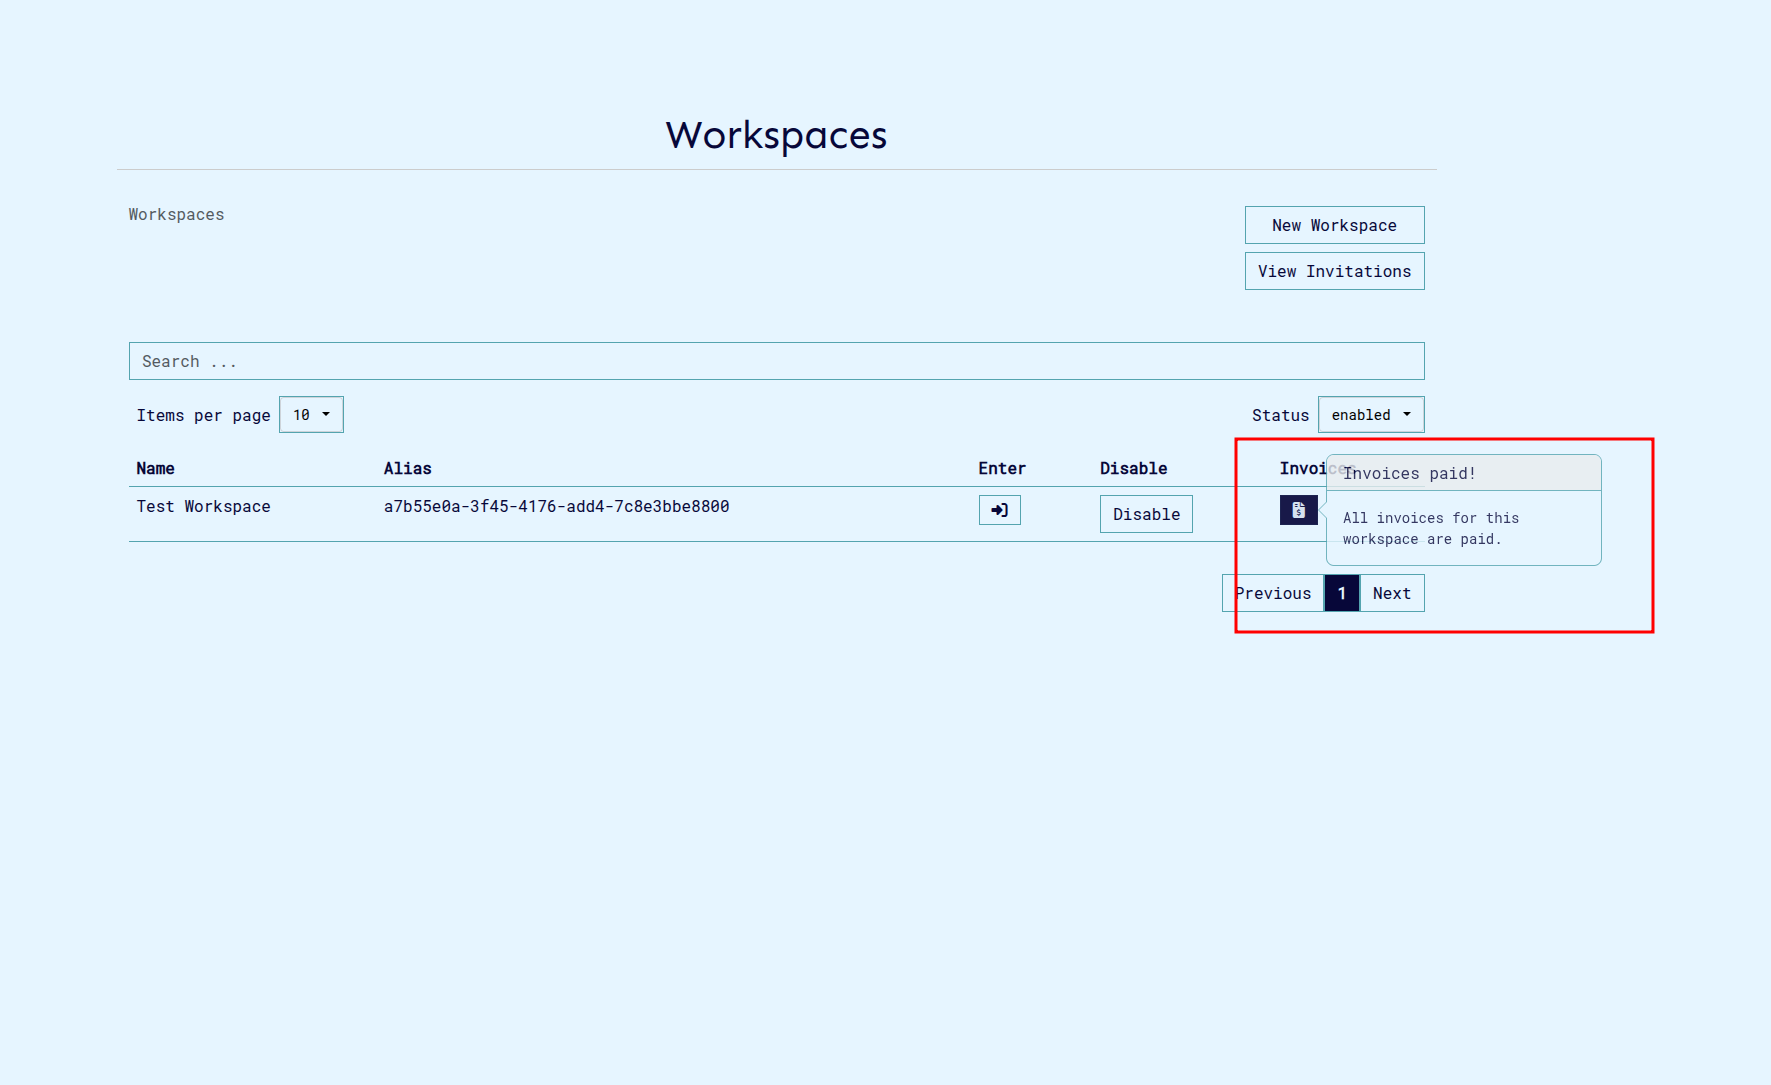
A sample CVM invoice is shown below.

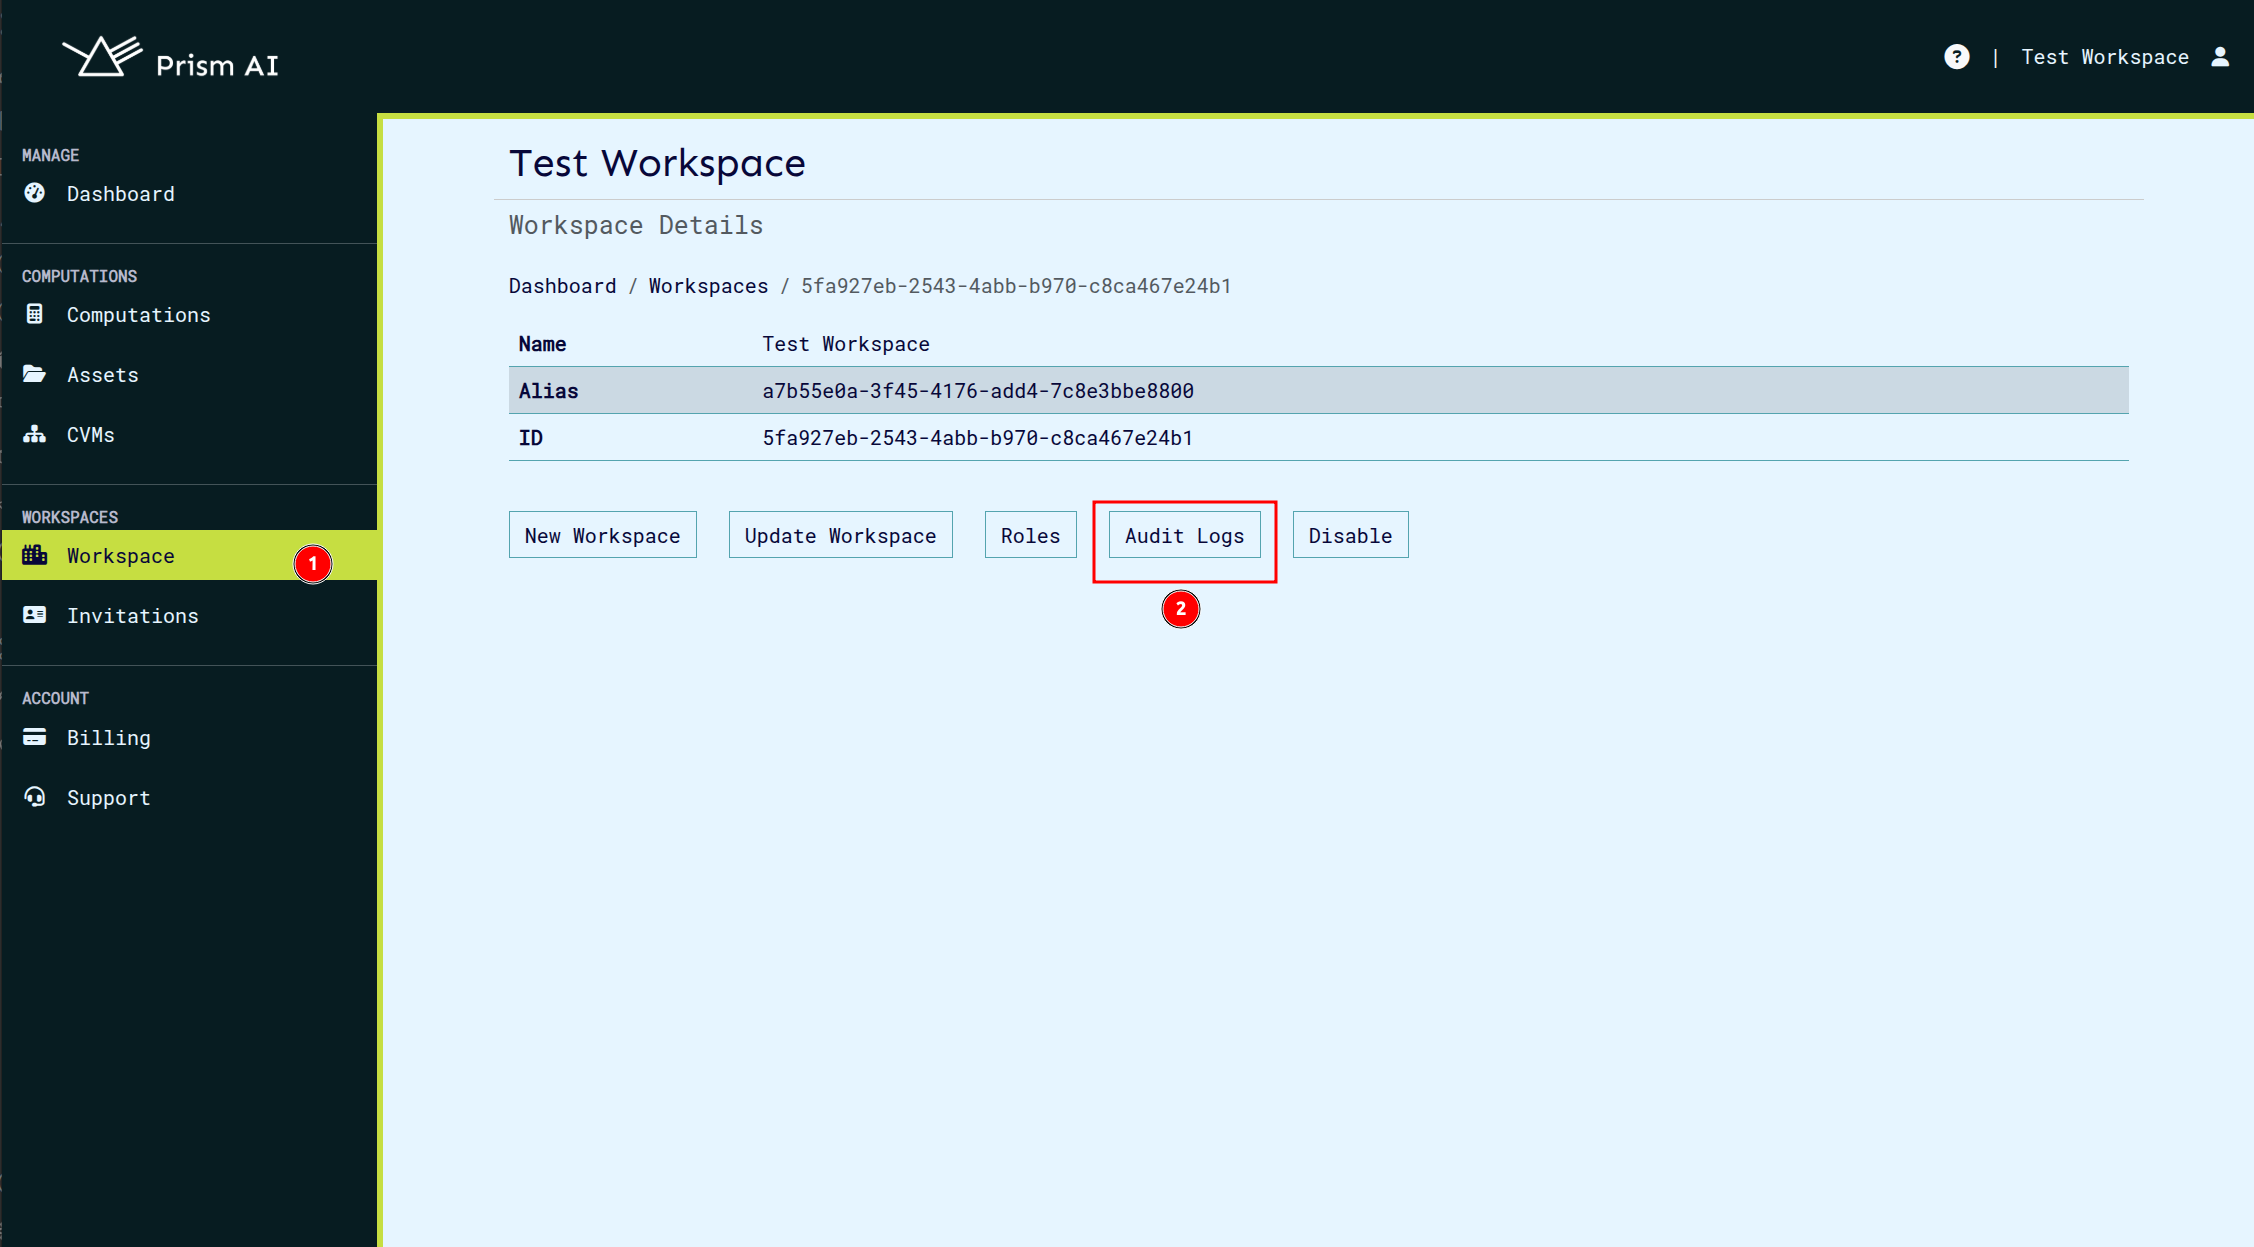
Audit Logs
Audit logs contain information on activities performed on the workspace that require billing. This includes computation creation, workspace membership invitations, CVM creation, and computation running. To view the audit logs, click the workspace tab on the sidebar and click on the "Audit Logs" button on the workspace page once opened.
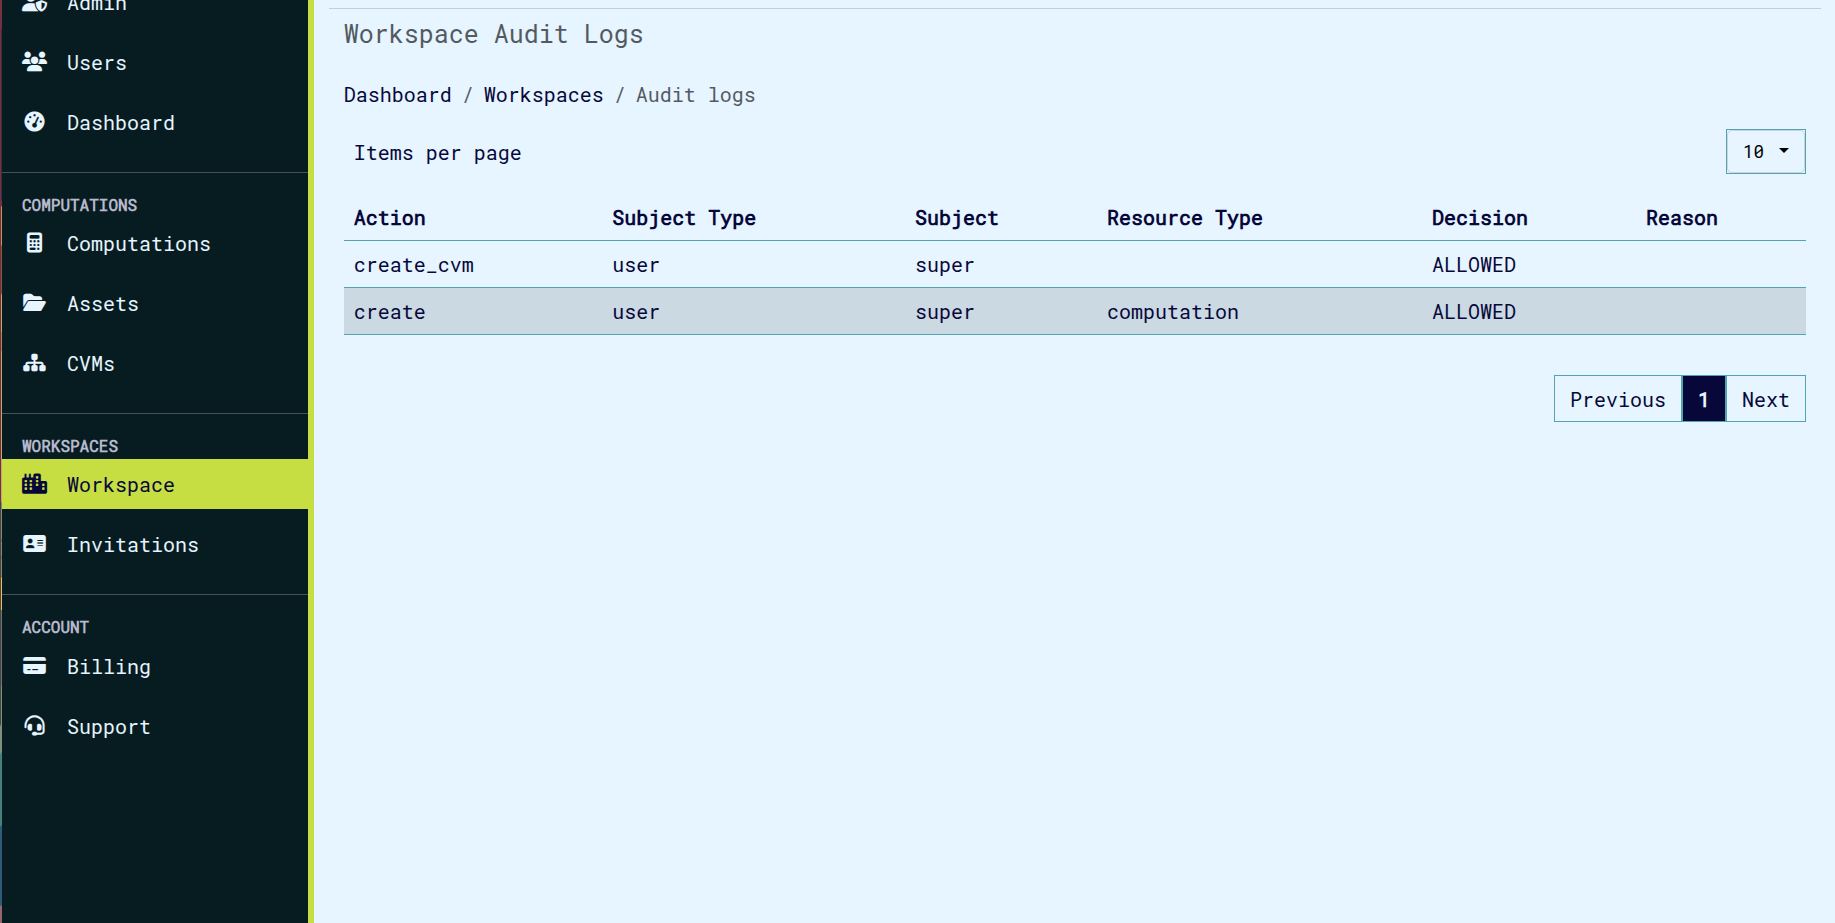
The audit logs will show a list of actions performed, the subject and subject type, the resource and whether the action was successful or not. This can help you track billing-related activities and ensure everything is in order.
Workspace Deletion
Workspace deletion is not allowed if there are any unpaid invoices. Ensure all invoices are paid before attempting to delete a workspace. This is to prevent loss of billing information and ensure that all financial obligations are met.
Billing Plan Details
Each billing plan has specific details regarding the services provided, limits, and costs. All billing plans have three resources, which are:
- Public Cloud CVMs: CVMs are billed based on usage time and resources allocated. Different plans offer different types of CVMs which are offered. We currently support GCP, and Azure Public CVMs; Ultraviolet VMs; and External VMs which are hosted by the user. While a plan may offer a particular flavor of CVM, the costs incurred will depend on the actual usage of the CVM, such as CPU, memory, and storage used.
- Computations: Each plan has a limit on the number of computations that can be run, and the number of computations that can be created in a workspace.
- Workspace Membership: The number of members allowed in a workspace differ based on the plan selected.